

You pull a fresh print off the bed, expecting something clean. Instead, you get drooping layers, gaps in the walls, or a first layer that never quite stuck.
It’s deflating. But here’s the thing worth knowing: nearly all of those problems trace back to calibration, not a broken machine. Learning how to calibrate 3D printer settings is the single skill that turns frustrating failures into prints you’re actually proud of.
The best part? You don’t need expensive gear. Patience and a few test prints will get you most of the way there.
In this guide, I’ll walk you through why calibration matters, the warning signs your machine needs it, and a step-by-step process that covers bed leveling, Z-offset, extrusion, temperature, and more. We’ll also cover the habits that keep everything dialed in over time.
Why Calibration Matters for Every Print
It’s tempting to skip calibration and just hit print. Modern machines come mostly assembled, after all, so surely they’re ready to go?
Not quite. Even a good printer drifts, and a poorly tuned one wastes filament, time, and patience in equal measure.
Better Print Quality and Accuracy
Calibration is what makes a print match the model on your screen. Sharp dimensions, smooth surfaces, walls that meet cleanly at the corners.
Without it, you get parts that look almost right but never quite fit. A calibrated printer closes that gap between design and reality.
Fewer Failed Prints and Wasted Filament
Every failed print costs you something. Filament, electricity, and the hours you spent waiting for it to finish.
A tuned machine slashes those failures dramatically. Warping, clogs, and prints peeling off the bed become rare rather than routine. That alone tends to pay back the calibration effort many times over.
Longer Machine Life
There’s a quieter benefit too. Correct settings put less strain on your nozzle, belts, and motors.
When a printer runs smoothly, its parts wear more evenly and last longer. Think of calibration as maintenance you do through software, not just a hunt for prettier prints.
Signs Your 3D Printer Needs Calibration
You don’t always need a schedule to know it’s time. The prints themselves usually tell you, if you know what to look for.
Reading these clues early saves you a pile of failed attempts.
Poor First Layer Adhesion
This is the most common complaint out there. Prints that lift at the corners, curl upward, or simply refuse to stick.
Nine times out of ten, the culprit is bed leveling or a bad Z-offset. When that first layer won’t cooperate, calibration is where you start looking.
Dimensional Inaccuracy
Grab your calipers and measure a printed part. If it comes out consistently larger or smaller than the model, something is off.
Usually it’s the steps-per-millimeter or the flow rate. These settings control how much the printer actually moves and extrudes, so a small error there shows up in every dimension.
Stringing, Blobs, and Rough Surfaces
Messy artifacts are their own kind of warning. Thin threads bridging gaps, little blobs on the surface, or walls that feel rough to the touch.
These usually point to temperature, retraction, or extrusion needing a tune. They’re annoying, sure, but also very fixable once you know which knob to turn.
What You Will Need Before You Start
The good news is that calibration leans more on patience than on fancy tools. You likely have most of what you need already.
A few basics will carry you through the whole process.
Basic Tools and Filament
Start with a sheet of paper or a feeler gauge for leveling, and a set of digital calipers for measuring. A small notebook helps too, more than you’d expect.
You’ll also want a reliable spool of filament you know well. Calibrating with a fresh, dry roll of a familiar brand keeps one variable out of the equation.
Calibration Test Files
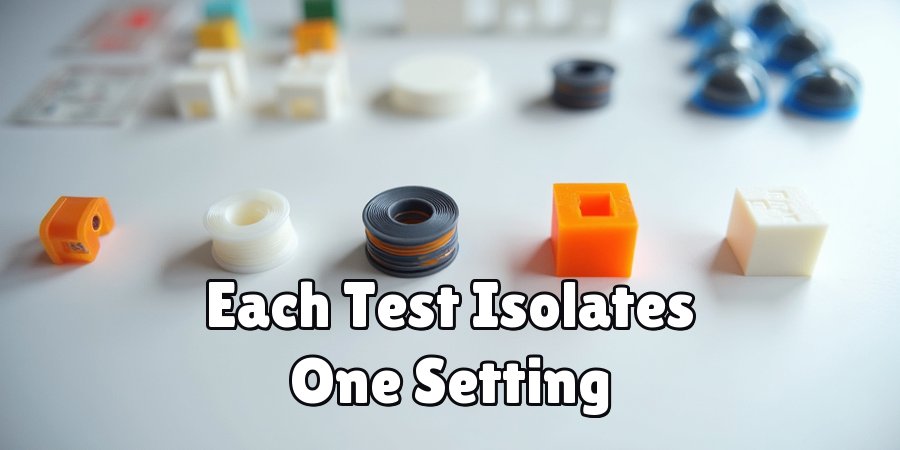
There are a handful of test prints worth downloading. A first-layer test, a temperature tower, a retraction test, and a simple calibration cube cover most of what you’ll do here.
Each one isolates a single setting. That focus is what makes them useful, since you can see exactly what your change did.
Time and Patience
This last one isn’t a tool, but it matters most. Calibration is a series of small tweaks, checked one at a time.
Rush it, and you’ll likely miss the setting that actually caused your problem. Slow and methodical wins here, even if it feels tedious in the moment.
How to Calibrate 3D Printer: Step-by-Step Guide
Here’s the core of it. Work through these seven steps in order, since each one builds on the last. Bed leveling comes first for a reason, and skipping ahead usually means redoing the earlier steps anyway.
Change one thing at a time. That single habit will save you more headaches than any other piece of advice in this article.
Step 1: Level the Print Bed
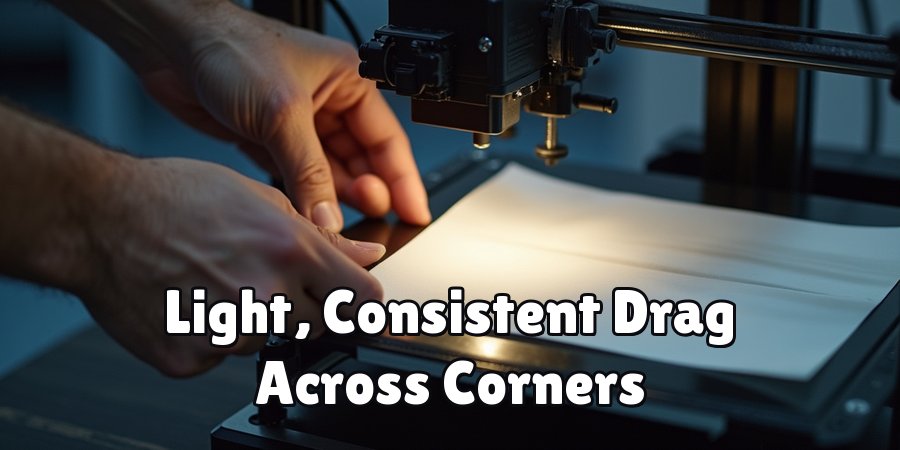
Home your printer, then move the nozzle to each corner in turn. Slide a sheet of paper underneath and adjust the bed screw until you feel a light, consistent drag.
That drag is your target across every corner. A level bed is the foundation every other setting depends on, so it’s worth doing slowly and getting right.
Step 2: Set the Z-Offset
Now fine-tune the gap between the nozzle and the bed. You want the first layer squished just enough to stick, without being flattened into a smear.
Print a small first-layer test and watch closely. The lines should sit flat and bond to each other with no gaps. Too high and they look round and separate; too low and they turn translucent and rough.
Step 3: Calibrate the Extruder (E-Steps)
This step checks whether your printer feeds the exact amount of filament it thinks it does. Mark 120mm of filament above the extruder, then tell the machine to extrude 100mm.
Measure what’s left. If the remaining mark isn’t at 20mm, your steps-per-millimeter need adjusting. It’s a fiddly step, admittedly, but getting E-steps right underpins everything about extrusion accuracy that follows.
Step 4: Dial In Printing Temperature
Print a temperature tower next. It’s a single model that prints each section at a different temperature, so you can compare them side by side.
Inspect the bands for the best mix of layer adhesion, surface detail, and clean bridging. The right temperature sits in a sweet spot, hot enough to bond strongly, cool enough to avoid stringing and blobs.
Step 5: Tune Retraction Settings
Retraction pulls filament back during travel moves, which stops oozing and stringing. Run a retraction test and adjust the distance and speed in small steps.
Bowden setups generally need more retraction distance than direct-drive machines. Make small changes, reprint, compare. Clean travel moves between features are the payoff, and they make a real difference to how professional a print looks.
Step 6: Calibrate Flow Rate
Print a thin-walled cube, sometimes called a single-wall test. Then measure the wall thickness with your calipers and compare it against the target set in your slicer.
If the wall is too thick or too thin, adjust the flow percentage to match. Accurate flow gives you solid, dimensionally correct parts, and it quietly fixes a lot of surface issues along the way.
Step 7: Verify With a Test Print
Finally, tie it all together. Print a calibration cube or a benchmark model like a Benchy to confirm every adjustment plays nicely with the rest.
Measure the result and look it over carefully. If it holds up, note your final settings somewhere safe. And take a moment to appreciate that clean print, because you earned it.
Best Practices for Accurate Calibration
A few habits separate a quick fix from lasting, reliable results. None of them are difficult, and they compound nicely over time.
Think of these as the guardrails that keep your calibration honest.
Change One Setting at a Time
I mentioned this earlier, and it bears repeating because it’s that important. Adjust a single variable, then reprint and observe.
Stack several changes together, and you’ll never know which one actually helped. Isolating each tweak turns guesswork into something closer to a real experiment.
Keep a Calibration Log
Write down your temperatures, offsets, and flow values. It feels like overkill until the day you swap filament, and everything goes sideways.
A quick log saves you from re-tuning from scratch every time. Future you will be grateful, especially when you find your notes right where you left them.
Recalibrate for New Materials
Different filaments behave differently. A brand, a color, even a new batch of the same PLA can shift the ideal settings.
So when you load something unfamiliar, retest the key values. Temperature and flow are the usual ones to revisit. It only takes a few minutes and spares you a mystery failure later.
Common Calibration Mistakes to Avoid
Everyone stumbles a little when they’re learning to calibrate. These are the missteps that show up most often, and each one is easy to sidestep once you know it’s coming.
No judgment here. I’ve made all of them at least once.
Skipping Bed Leveling
It’s tempting to assume the bed is fine and jump to the interesting settings. That assumption tends to backfire.
An uneven bed undermines every adjustment you make afterward, no matter how careful. Level it first, always, and build from there.
Adjusting Too Many Settings at Once
The eagerness to fix everything fast is understandable. It’s also counterproductive.
When you change three things, and the print improves, you’ve learned nothing about which change mattered. Worse, one bad tweak can hide behind a good one, leaving you chasing ghosts.
Ignoring Filament Differences
People often blame the printer when the real issue is the spool. Filament brand, color, and moisture all shift how a material prints.
A damp roll in particular causes stringing and weak layers that no setting fully cures. Before you tear your calibration apart, ask whether the filament might be the problem.
Tips for Keeping Your Printer Calibrated
Calibration isn’t a one-time event. It drifts, quietly, until a print reminds you. A little upkeep keeps that drift from turning into a failure.
These small routines are easy to fold into your printing habits.
Check Bed Level Regularly
Beds shift over time. A bump, a temperature change, or just repeated use can throw them off.
Run a quick level check before any big or important print. It takes a minute and catches drift before it ruins a twelve-hour job.
Store Filament Properly
Dry filament prints consistently, which means your calibrated settings actually hold. Damp filament does the opposite.
Keep spools in sealed containers with desiccant between uses. It’s a simple habit that protects both your prints and your carefully tuned profiles.
Inspect Belts and Nozzles
Loose belts, worn nozzles, and bits of debris all degrade print quality slowly enough that you might not notice. Then one day the prints look bad, and you can’t figure out why.
An occasional check keeps these small issues from sneaking up. Tighten what’s loose, clean what’s clogged, and your calibration stays meaningful.
When to Seek Expert Help
Most calibration problems respond to the steps above. But not all of them, and it helps to recognize when the trouble runs deeper than settings.
Knowing the limits of a software fix saves you from endless, fruitless tweaking.
Persistent Problems After Full Calibration
You’ve leveled, tuned, and tested everything. And still, the prints keep failing in the same way.
At that point, the issue may be hardware rather than settings. No amount of slicer adjustment fixes a worn part or a mechanical fault, so it’s worth stepping back and looking there.
Mechanical or Electronic Issues
Listen to your machine and watch how it moves. Grinding noises, inconsistent motion, or heating errors all point beyond calibration.
These often call for forum support, a technician, or replacement parts. There’s no shame in it. Sometimes a printer simply needs a repair, not another round of fine-tuning.
Frequently Asked Questions
A few questions come up again and again once people start calibrating. Here are honest answers.
How Often Should I Calibrate My 3D Printer?
A full calibration makes sense after any major change, like a new nozzle, a firmware update, or a printer move. Beyond that, a quick check before important prints usually suffices.
You don’t need to recalibrate everything constantly. Bed level and Z-offset deserve the most frequent attention, since they drift the fastest.
Do I Need to Recalibrate for Every Filament?
Not entirely, but the key settings often need a look. Temperature and flow rate can shift noticeably between materials and even brands.
A quick temperature tower and a flow check when you switch filaments will catch most of it. It’s faster than diagnosing a bad print later.
How Long Does Calibration Take?
Your first thorough calibration might eat up an afternoon, especially if you’re learning as you go. That’s normal.
Once you have your baseline and a log to reference, routine touch-ups take only minutes. The big investment is up front; the maintenance is light.
Conclusion
Learning how to calibrate 3D printer settings genuinely changes your experience with the machine. Frustrating, unpredictable failures give way to prints that come out clean and correct, over and over.
The process follows a clear path. Level the bed, set the Z-offset, then work through extrusion, temperature, retraction, and flow before confirming it all with a test print.
A few habits keep you there. Change one setting at a time, keep a calibration log, and recalibrate when you load new filament.
So start with bed leveling, since that’s where most problems begin, and move through each step patiently. There’s a real satisfaction in pulling a flawless print off a machine you dialed in yourself. Give it a go this week, and see how much better your prints can get.

About
Zevric Halden is a dedicated expert in the world of 3D printing, printer repair, and additive manufacturing, with years of hands-on experience troubleshooting, maintaining, and optimizing desktop 3D printers. His professional focus lies in combining practical mechanical knowledge with modern 3D printing technologies to help users solve printer problems, improve print quality, and keep their machines running reliably. As the author of 3DMend, Zevric explores the technical side of 3D printing, making complex printer issues easier to understand for makers, hobbyists, and professionals alike.
Education
Rochester Institute of Technology
(Rochester, New York, USA)
Associate Degree in Mechanical & Manufacturing Technology
- Focused on mechanical systems, manufacturing processes, machine maintenance, and precision tools.
- Developed practical experience with mechanical troubleshooting, electronic components, and computer-controlled equipment.
- Gained hands-on knowledge of CAD systems, rapid prototyping, and additive manufacturing technologies.
Worcester Polytechnic Institute
(Worcester, Massachusetts, USA)
Bachelor’s in Mechanical Engineering & Additive Manufacturing
- Specialized in digital fabrication, 3D printing systems, mechanical design, and manufacturing technologies.
- Studied printer calibration, motion systems, extrusion mechanisms, material behavior, and print optimization.
- Participated in practical engineering projects involving rapid prototyping, machine diagnostics, and 3D-printed components.
Publications and Impact
Through 3DMend, Zevric shares his expertise on 3D printer troubleshooting, maintenance, calibration, hardware repair, print-quality issues, and additive manufacturing. His writing focuses on turning frustrating printer problems into clear, practical solutions that readers can understand and apply.
From nozzle clogs and extrusion problems to bed-leveling issues, calibration errors, overheating, unusual noises, failed prints, and mechanical wear, Zevric’s guides are designed to help users identify the underlying cause rather than simply treating the symptoms.
His work bridges the gap between technical engineering knowledge and everyday 3D printing, making reliable repair and maintenance information accessible to everyone—from first-time 3D printer owners and hobbyists to experienced makers and professionals.