

You finish a batch of prints, lift the lid, and there it is. A pool of leftover resin sitting in the vat, half-used and slightly murky, quietly asking what you plan to do with it.
That moment trips up a lot of newcomers. Resin feels finicky in a way filament never does, and the right way to swap it out isn’t always obvious.
Learning how to change resin in 3D printer keeps your prints sharp, protects the machine, and lets you jump between colors or materials without much fuss. Resin does demand respect, sure. But once you break the process into clear steps, it stops feeling intimidating.
This guide covers why resin changes matter, the gear you’ll want, a full step-by-step method, and the habits that keep your vat and FEP film in good shape. Whether you print daily or only on the odd weekend, the routine stays the same.
Why Changing Resin Matters
Before we get into gloves and filters, it helps to understand what’s actually at stake. A resin change isn’t busywork. It protects both your print quality and the machine underneath.
Switching Colors and Material Types
The obvious reason is variety. Emptying and refilling the vat lets you move between colors, standard resins, and specialty blends like tough or flexible formulas.
You can’t really mix these mid-vat. So a clean swap is what makes switching possible in the first place.

Preventing Contamination and Cured Debris
Old resin tends to collect things it shouldn’t. Cured flakes, dust, and stray bits settle in over time, and they can ruin a fresh print without warning.
A proper change clears that debris out. It’s the difference between a crisp result and a print pocked with mystery defects.
Protecting Your Printer and Prints
Regular changes keep the vat, FEP film, and LCD screen healthy. Leaving stagnant resin sitting there may shorten the life of those parts.
That matters financially, too. Replacing a screen or a vat costs far more than the few minutes a careful swap takes.
Understanding Resin and Safety First
Here’s where I’d slow you down for a second. Resin isn’t dangerous if you treat it sensibly, but it’s not something to wave around carelessly either.
How Liquid Resin Behaves
Uncured resin is sticky, messy, and sensitive to light. Leave it exposed, and it starts curing on its own, especially near a window.
That sensitivity is why deliberate handling matters. Quick, careless movements tend to leave drips and smears you’ll regret cleaning later.
Essential Safety Precautions
Gloves are non-negotiable. Nitrile ones, ideally, since resin can irritate skin on contact. Eye protection and decent ventilation round out the basics.
Keep resin off your skin and out of direct sunlight during the change. None of this is hard. It just takes a little forethought before you start pouring.
Safe Disposal Rules
This part gets overlooked, and it shouldn’t. Leftover resin must be cured before you throw it away, and it should never go down a drain.
Curing turns liquid resin into inert solid plastic. A patch of sunlight or a UV lamp handles small amounts, keeping both you and the environment out of trouble.
Tools and Materials You Will Need
Good news on the shopping front. A resin change needs only a handful of affordable items, and you may already own most of them.
Gloves, Filters, and Containers
Nitrile gloves protect your hands. Paper or fine mesh filters catch cured flakes as you pour. Sealed containers hold resin cleanly during and after the swap.
Keep the resin’s original bottle nearby. It’s the safest place to return filtered resin for later use.
Cleaning Supplies and Paper Towels
Isopropyl alcohol does the heavy lifting for cleanup. A soft cloth and a stack of paper towels catch drips and wipe down the vat.
Lay a few towels across your work area before you begin. Resin finds its way onto surfaces you didn’t expect, so a little coverage goes a long way.
Scrapers and Vat Tools
A soft plastic scraper is worth having. It lifts cured bits off the FEP film without scratching or puncturing it.
Avoid anything metal or sharp here. One careless gouge and you’re looking at a leaking vat and a replacement film.
How to Change Resin in 3D Printer: Step-by-Step Guide
This is where careful prep turns into a clean, safe swap. Work through it in order and resist the urge to rush. Resin rewards patience and punishes shortcuts.
Step 1: Prepare Your Workspace and Gear Up
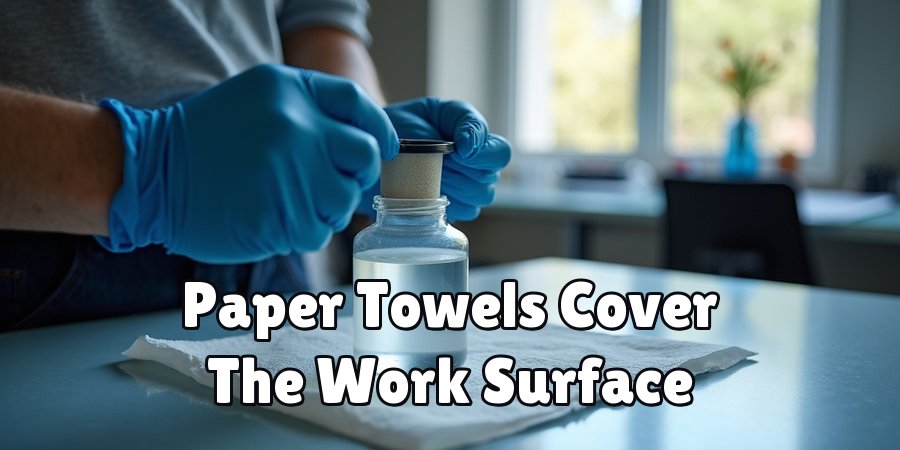
Start by laying down paper towels across your work surface. Open a window or switch on a fan for airflow.
Then gear up. Gloves on, eye protection in place, before you touch a single drop. This setup feels fussy, but it saves you from a messy, sticky cleanup later.
Step 2: Remove the Vat From the Printer
Loosen the vat screws and lift it out slowly. Keep it level the whole way, since tilting invites spills over the edges.
Move gently and deliberately. A vat full of liquid resin is easy to slosh, and the resin is stubborn about coming off whatever it lands on.
Step 3: Filter and Pour the Old Resin Back
Position a filter over the mouth of the original bottle. Pour the leftover resin through it slowly, letting the mesh catch any cured flakes.
This step saves clean resin for future prints while trapping the debris that causes failures. Take your time here. A steady, unhurried pour keeps splashes to a minimum.
Step 4: Clean the Vat and FEP Film
With the resin back in its bottle, wipe the vat down with isopropyl alcohol and a soft cloth. Work gently across the FEP film to clear any residue.
If cured bits cling to the film, ease them off with a soft plastic scraper. Never dig or press hard. The film is thin, and a scratch now becomes a leak later.
Step 5: Add the New Resin
Shake the new bottle well first. Settled pigments and additives need mixing back in for consistent results.
Then pour slowly into the clean vat, stopping at the fill line. Pouring too fast introduces bubbles, and overfilling risks spillage during printing. Neither helps.
Step 6: Reinstall the Vat and Run a Test
Refit the vat and tighten the screws so it sits securely and level. A loose vat can throw off your prints or, worse, leak.
Then run a small test print. This confirms everything is clean, aligned, and ready before you commit to a longer job. It’s a quick check that appears to save a lot of wasted resin down the line.
Cleaning the Vat and FEP Film Properly
The finishing touches are where a lot of print quality quietly lives. A clean vat and healthy film keep light passing through the way it should.
Removing Cured Resin Safely
Sometimes a thin layer of resin cures onto the FEP, usually after a failed print. Lift it gently with a soft scraper rather than forcing it.
Work slowly, and the whole sheet often peels off in one piece. Rushing risks tearing or scratching the film, which defeats the point.
Wiping Down With Isopropyl Alcohol
A light pass with isopropyl alcohol clears residue and haze. The goal is a clear vat that lets light through cleanly.
Don’t drown it in alcohol, though. A damp cloth does more good than a soaking one, and it dries faster too.
Inspecting the FEP for Damage
While you’re in there, give the film a proper look. Check for scratches, cloudiness, or small dents.
These signs suggest the film is nearing the end of its useful life. Catching that early beats discovering it mid-print when a job suddenly fails.

Storing Leftover Resin the Right Way
Nothing needs to go to waste. Filtered resin stores well, and a little care keeps a partial bottle usable for months.
Filtering Before Storage
Strain resin before it goes back in the bottle. This removes debris and cured specks that would otherwise contaminate the batch.
It’s a small habit with real payoff. Clean stored resin means fewer surprises the next time you pour it.
Sealing and Labeling Bottles
Cap bottles tightly to keep light and air out. Then jot down the color or type on the label.
An organized shelf saves genuine frustration later. Hunting for the right resin among a dozen unmarked bottles gets old fast.
Keeping Resin Away From Light
Store bottles somewhere cool and dark. Light exposure slowly cures resin even inside the bottle, shortening its shelf life.
A cabinet or drawer works fine. Anywhere out of direct sun and away from heat keeps the resin printable for far longer.
Common Mistakes and How to Avoid Them
Everyone stumbles through a few of these early on. Knowing them ahead of time won’t make you flawless, but it thins out the frustration.
Skipping Gloves and Ventilation
Handling resin bare-handed is a mistake you make exactly once. It irritates skin, and the fumes aren’t pleasant in a closed room.
Gloves and airflow fix both problems. They take seconds to set up and spare you real discomfort.
Pouring Resin Without Filtering
Returning unfiltered resin traps cured bits in the bottle. Those bits then seed failures in later prints.
Always filter. It’s a ten-second step that quietly protects every print that follows.
Scratching the FEP During Cleaning
Sharp tools and the FEP film don’t mix. One careless scrape can puncture it, and a punctured film leaks resin onto the screen below.
Use soft plastic scrapers only. Gentle pressure clears cured resin without risking the film underneath.
Tips for Smooth Resin Changes Every Time
A few habits turn resin changes from a dreaded chore into a quick, tidy routine. None of them ask much of you.
Working in Small, Careful Steps
Slowing down prevents spills. Deliberate movements keep resin where it belongs and the whole process cleaner.
Rushing rarely saves time here. It usually creates a mess that eats up more minutes than you saved.
Keeping a Dedicated Cleanup Kit
Store your gloves, filters, and paper towels together in one spot. Having everything in reach makes changes faster and far less stressful.
A shoebox or bin does the job. When the gear lives in one place, you never scramble mid-pour.
Checking Resin Before Refilling
Shake and inspect new resin before it goes in. Well-mixed resin pours smoothly and prints consistently.
Settled or separated resin can give patchy results. A quick check up front prevents that entirely.
Conclusion
That’s the full picture of how to change resin in 3D printer, from gearing up safely through cleaning the vat and storing what’s left. None of it demands special skill, which is really the point.
A few simple habits carry most of the weight. Filtering carefully, wiping down the FEP, and handling resin with a bit of respect make the difference between messy failures and clean, reliable prints.
Take one small step today. Set up a dedicated cleanup kit, or filter the resin already sitting in your vat and see how much smoother the next change feels.
Resin swaps become second nature quickly, honestly faster than most people expect. Before long, you’ll change resin without a second thought, ready to print whatever comes next.

About
Zevric Halden is a dedicated expert in the world of 3D printing, printer repair, and additive manufacturing, with years of hands-on experience troubleshooting, maintaining, and optimizing desktop 3D printers. His professional focus lies in combining practical mechanical knowledge with modern 3D printing technologies to help users solve printer problems, improve print quality, and keep their machines running reliably. As the author of 3DMend, Zevric explores the technical side of 3D printing, making complex printer issues easier to understand for makers, hobbyists, and professionals alike.
Education
Rochester Institute of Technology
(Rochester, New York, USA)
Associate Degree in Mechanical & Manufacturing Technology
- Focused on mechanical systems, manufacturing processes, machine maintenance, and precision tools.
- Developed practical experience with mechanical troubleshooting, electronic components, and computer-controlled equipment.
- Gained hands-on knowledge of CAD systems, rapid prototyping, and additive manufacturing technologies.
Worcester Polytechnic Institute
(Worcester, Massachusetts, USA)
Bachelor’s in Mechanical Engineering & Additive Manufacturing
- Specialized in digital fabrication, 3D printing systems, mechanical design, and manufacturing technologies.
- Studied printer calibration, motion systems, extrusion mechanisms, material behavior, and print optimization.
- Participated in practical engineering projects involving rapid prototyping, machine diagnostics, and 3D-printed components.
Publications and Impact
Through 3DMend, Zevric shares his expertise on 3D printer troubleshooting, maintenance, calibration, hardware repair, print-quality issues, and additive manufacturing. His writing focuses on turning frustrating printer problems into clear, practical solutions that readers can understand and apply.
From nozzle clogs and extrusion problems to bed-leveling issues, calibration errors, overheating, unusual noises, failed prints, and mechanical wear, Zevric’s guides are designed to help users identify the underlying cause rather than simply treating the symptoms.
His work bridges the gap between technical engineering knowledge and everyday 3D printing, making reliable repair and maintenance information accessible to everyone—from first-time 3D printer owners and hobbyists to experienced makers and professionals.