

A print comes off the bed looking promising, then the light catches it. Suddenly you see every layer line, a few gaps, and a handful of rough patches the eye glosses over indoors. That texture is exactly what stops so many prints from looking finished.
Wood filler fixes it, and cheaply. Learning how to use wood filler on 3d prints is one of the simplest ways to turn a ridged surface into something smooth and ready for paint.
The material is forgiving too. It’s budget-friendly, easy to work, and it doesn’t punish beginners the way some finishing methods do.
This guide walks through why filler works so well, the tools involved, a full step-by-step method, and the finishing habits that lead to a genuinely professional look. Prop, decoration, or functional part — the approach holds up across all of them.
Why Wood Filler Works Great on 3D Prints
Before opening a tub, it helps to know why makers reach for filler in the first place. It solves a specific problem that plagues nearly every printed surface.
Filling Layer Lines and Gaps
Layer lines are the giveaway of a printed object. Wood filler settles into those ridges and seams, smoothing out the stepped texture that FDM printing leaves behind.
It packs into the low spots where the eye would otherwise catch. A little pressed into the right grooves can flatten a surface that once looked distinctly manufactured.
Affordable and Beginner-Friendly
Cost is a big part of the appeal. Filler runs cheap, needs no special skills, and forgives mistakes since you can sand it back and try again.
That last point matters more than it sounds. If you botch an application, it’s not the end — you scrape, re-apply, and move on without much lost.
A Strong Base for Paint
A filled, sanded surface holds primer and paint far better than raw plastic does. The finish looks cleaner because the foundation underneath is even.
Skip this step and the layer lines telegraph straight through your paint. Fill first, and the color sits on something worth looking at.
Understanding Wood Filler and How It Bonds
A quick look at the material makes every later step make more sense. Filler isn’t complicated, but knowing how it behaves saves you some trial and error.
What Wood Filler Actually Is
Wood filler is essentially a paste of fine particles held together with a binder. It dries hard, sands smooth, and grips well onto plastics like PLA and PETG.
That’s the whole trick, really. It goes on soft and workable, then cures into something you can shape like the print itself.
Water-Based vs Solvent-Based Fillers
You’ll find two broad types. Water-based fillers clean up with a damp cloth and suit most prints, which makes them the easy default for indoor work.
Solvent-based options dry harder and can hold up better on demanding pieces. They ask for more ventilation and a bit more care, though, so weigh that before reaching for them.
How Well It Sticks to Plastic
Filler bonds nicely to clean, lightly sanded prints. The key phrase there is surface prep, since a slick or greasy surface gives it little to grab.
Scuff the plastic first and adhesion improves noticeably. It’s a small step that appears to decide whether the filler stays put or peels weeks later.
Tools and Materials You Will Need
Good news for anyone dreading a shopping list. This project asks for only a handful of affordable items.
Wood Filler and Application Tools
Start with a filler suited to your print, then grab something to spread it. A putty knife or small spatula works, and honestly, a fingertip does fine for pressing paste into stubborn grooves.
You don’t need anything fancy here. A flexible spreader that hugs the surface beats a rigid one that skips over the low spots.
Sanding Supplies
Sandpaper does most of the finishing work. A range of grits, from coarse to fine, lets you knock down excess filler and then blend the surface smooth.
Skipping straight to fine paper is a common temptation. Resist it — coarse grit removes material, fine grit polishes, and each has its place.
Cleaning and Safety Basics
A dust mask matters more than people assume, since sanding filler kicks up fine particles you’d rather not breathe. Gloves, a damp cloth, and decent airflow round out the kit.
None of it is expensive. Setting it out before you start beats scrambling for a mask once the dust is already in the air.
Preparing Your 3D Print Before Filling
Groundwork decides how well the filler sticks and blends. Rush this and the whole project feels harder than it should.
Cleaning the Print Surface
Wipe away dust, oils, and fingerprints first. Filler bonds evenly to a clean surface, and it lifts or flakes on a dirty one.
A quick pass with isopropyl alcohol handles most of it. Let the print dry fully before moving on.
Removing Supports and Rough Spots
Clear any leftover support marks and stray strands next. These little nubs get in the way and leave the filler an uneven base to work over.
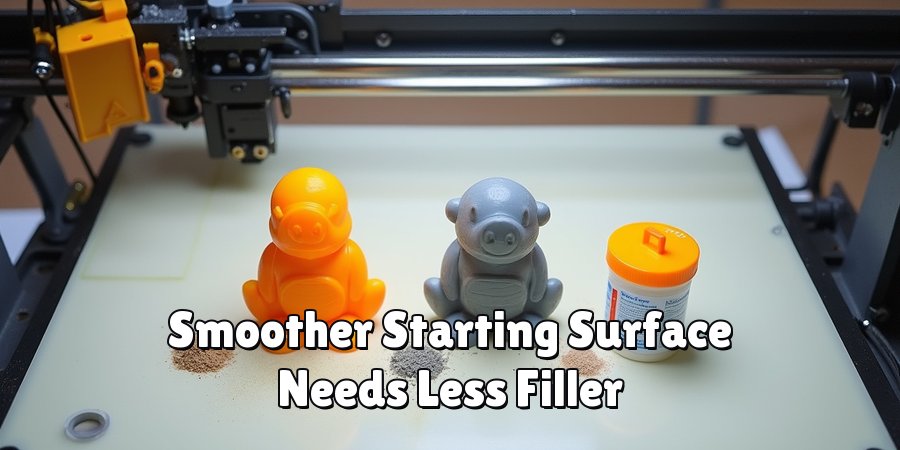
Snip or sand them off cleanly. A smoother starting surface means less filler and less sanding later.
Light Sanding for Better Adhesion
Give the print a quick scuff with medium grit. This roughens the surface just enough for the filler to grip.
You’re not trying to remove material here. A light texture across the print is all the filler needs to hold on across the whole piece.
How to Use Wood Filler on 3D Prints: Step-by-Step Guide
Here’s where a rough print starts becoming a smooth, paint-ready piece. Work through it in order, and give each step the time it asks for. The drying stage especially rewards patience and punishes shortcuts.
Step 1: Prepare the Print and Your Workspace
Clean the print, lay down some protective paper, and gather your tools before opening the filler. A tidy, well-lit area makes the whole thing less messy.
Put your mask and gloves on early too. Sanding creates fine dust worth avoiding, and it’s easier to gear up now than mid-task.
This prep feels like a delay. It isn’t. A calm, ready workspace lets the following steps go cleanly instead of turning into a scramble for supplies.
Step 2: Apply the First Layer of Filler
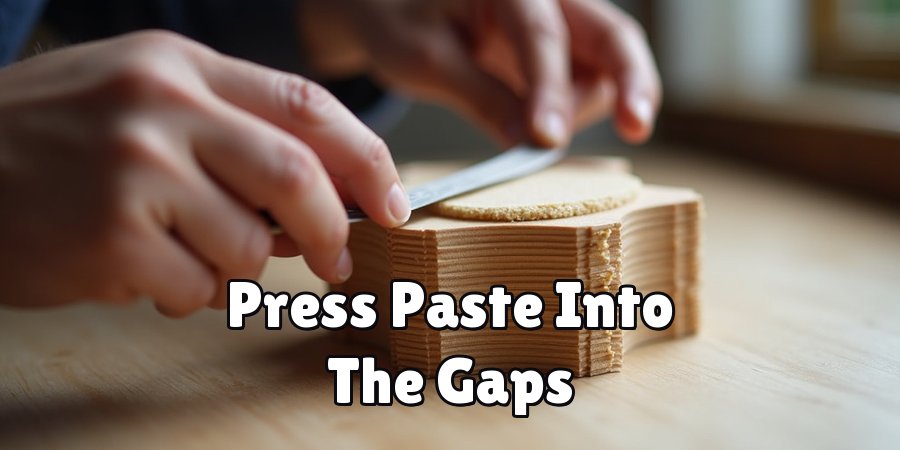
Scoop a small amount onto your putty knife and spread it across the layer lines with firm, even pressure. Press the paste into the gaps rather than just smearing it over the top.
Work in small sections so the filler stays manageable and doesn’t dry before you’ve shaped it. A thin, deliberate coat beats a thick one.
Excess just means more sanding later. Resist the urge to slather it on, since a controlled application saves you real effort down the line.
Step 3: Smooth and Shape While Wet
Use the edge of the knife or a damp finger to smooth the filler before it sets, following the model’s contours. Shaping it now saves sanding time later.
Wipe excess off the raised areas so only the low spots stay filled. This keeps fine details from vanishing under too much paste.
Done well, this step leaves a surface already close to smooth. The filler is doing part of the finishing work before it even dries.
Step 4: Let the Filler Fully Dry
Set the print aside and give the filler enough time to cure completely. Rushing this stage leads to gummy, uneven sanding and a ruined surface.
Check the manufacturer’s dry time, then add a few extra minutes for any thick spots. Thicker areas hold moisture longer than the thin ones.
Patience here protects everything before it. A fully hardened layer sands cleanly and keeps its shape, so the quiet pause pays off.
Step 5: Sand the Surface Smooth
Start sanding with a coarser grit to knock down the high spots, then move to finer grits for a smooth finish. Light, even strokes blend the filler into the print without gouging the plastic.
Check the surface often under good light. Raking light reveals ridges and dips that flat lighting hides completely.
This is where the model truly transforms. A clean, seamless surface emerges from beneath what used to be visible layer lines.
Step 6: Inspect and Reapply if Needed
Look the print over closely for pinholes, missed grooves, or thin spots where lines still show. A second thin coat fills these gaps for a flawless result.
Repeat the fill, dry, and sand cycle until the surface feels perfectly smooth. One round rarely catches everything, and that’s normal.
A little extra attention here is what separates good from great. The reward is a print genuinely ready for primer and paint.
Sanding and Blending for a Smooth Finish
Sanding is where a filled print becomes a seamless one. It’s tedious, admittedly, but it carries a lot of the final quality.
Choosing the Right Sandpaper Grits
Start coarse and finish fine. Coarser grit removes excess filler quickly, while finer grit leaves the smooth, even surface you’re after.
Jumping straight to fine paper just polishes the flaws. Let each grit do its part before moving up.
Wet Sanding for Extra Smoothness
Lightly wetting the sandpaper cuts down on dust and produces an ultra-smooth finish. This suits display pieces where the surface really matters.
It’s an optional step for rougher functional parts. But for anything you’ll paint and show off, wet sanding may be worth the slight extra fuss.
Blending Filled Areas Into the Print
Feather the edges of each filled spot so it fades into the surrounding plastic. Hard edges around a patch catch the eye later.
Blended right, the filled areas nearly disappear. The surface reads as one continuous piece rather than plastic with repairs.
Priming and Painting Your Finished Print
The rewarding part arrives once the surface is smooth. Priming and painting bring the whole piece to life.
Applying Primer for an Even Base
A coat of primer gives paint a consistent surface to grip. It also reveals any flaws still hiding in the plastic.
Keep it even and thin. Primer isn’t the finish — it’s the honest layer that shows you what still needs work.
Spotting and Fixing Missed Areas
Primer has a habit of exposing pinholes and lines you missed. Frustrating in the moment, but genuinely useful.
Fill and sand those spots once more, then re-prime. This back-and-forth is normal and gets you closer to a flawless base each pass.
Painting for a Professional Look
Thin, even coats of paint over a smooth base deliver rich color and a truly finished result. Several light coats beat one heavy one.
Rushing with a thick coat invites drips and uneven color. Take your time, and the smoothed surface underneath does the rest.
Common Mistakes and How to Avoid Them
Everyone stumbles through a few of these early on. Knowing them ahead of time won’t make you perfect, but it thins the frustration considerably.
Applying Too Much Filler at Once
Thick coats crack, shrink, and take forever to dry. They also leave you sanding away far more than necessary.
Thin, layered applications work far better. Build the surface up gradually rather than trying to bury the lines in one go.
Sanding Before It Fully Dries
Impatient sanding gums up the paper and tears the soft filler. Careful work undone in seconds.
Wait for a full cure. It’s dull advice, but a hardened surface sands clean where a soft one just smears.
Skipping Surface Preparation
Filler applied to a dirty surface peels and refuses to bond. The prep you skipped comes back to haunt you.
Clean and scuff the print first, every time. Two minutes of preparation spares you a lifting, flaking mess later.
Tips for Professional-Quality Results Every Time
A handful of habits separate consistent results from lucky ones. None are complicated; they just take a little discipline.
Working in Thin, Patient Layers
Building up filler gradually gives smoother results and far less sanding than one heavy coat. It feels slower, yet it usually finishes faster.
The thin-layer approach is forgiving too. Small corrections beat wrestling a thick, cracked slab back into shape.
Keeping a Consistent Workflow
Follow the same fill, dry, sand, and inspect rhythm each time. A repeatable process makes every print come out cleaner and more predictable.
You stop reinventing the method with each project. Once the sequence is muscle memory, the quality follows almost on its own.
Testing on Small Prints First
Practice on a spare print before finishing a favorite. A test piece teaches you how the filler behaves without risking anything you care about.
It’s cheap insurance. Ten minutes on scrap can save a model you spent hours printing.
Conclusion
That’s the full picture of how to use wood filler on 3d prints, from prepping the surface right through sanding it to a smooth, paint-ready finish. None of it demands special skill, which is really the point.
A few simple habits carry most of the weight. Thin layers, a full dry time, and patient sanding make the difference between a rough model and a genuine showpiece.
Take one small action today. Grab a tub of filler, or smooth a print already sitting on your desk and see how much it improves.
This skill becomes second nature quickly, faster than most people expect. Before long you’ll finish your next print with confidence and watch a plain surface turn into something worth showing off.

About
Zevric Halden is a dedicated expert in the world of 3D printing, printer repair, and additive manufacturing, with years of hands-on experience troubleshooting, maintaining, and optimizing desktop 3D printers. His professional focus lies in combining practical mechanical knowledge with modern 3D printing technologies to help users solve printer problems, improve print quality, and keep their machines running reliably. As the author of 3DMend, Zevric explores the technical side of 3D printing, making complex printer issues easier to understand for makers, hobbyists, and professionals alike.
Education
Rochester Institute of Technology
(Rochester, New York, USA)
Associate Degree in Mechanical & Manufacturing Technology
- Focused on mechanical systems, manufacturing processes, machine maintenance, and precision tools.
- Developed practical experience with mechanical troubleshooting, electronic components, and computer-controlled equipment.
- Gained hands-on knowledge of CAD systems, rapid prototyping, and additive manufacturing technologies.
Worcester Polytechnic Institute
(Worcester, Massachusetts, USA)
Bachelor’s in Mechanical Engineering & Additive Manufacturing
- Specialized in digital fabrication, 3D printing systems, mechanical design, and manufacturing technologies.
- Studied printer calibration, motion systems, extrusion mechanisms, material behavior, and print optimization.
- Participated in practical engineering projects involving rapid prototyping, machine diagnostics, and 3D-printed components.
Publications and Impact
Through 3DMend, Zevric shares his expertise on 3D printer troubleshooting, maintenance, calibration, hardware repair, print-quality issues, and additive manufacturing. His writing focuses on turning frustrating printer problems into clear, practical solutions that readers can understand and apply.
From nozzle clogs and extrusion problems to bed-leveling issues, calibration errors, overheating, unusual noises, failed prints, and mechanical wear, Zevric’s guides are designed to help users identify the underlying cause rather than simply treating the symptoms.
His work bridges the gap between technical engineering knowledge and everyday 3D printing, making reliable repair and maintenance information accessible to everyone—from first-time 3D printer owners and hobbyists to experienced makers and professionals.