

There’s something a little surreal about holding a metal part that came out of a 3D printer. Learning how to 3D print metal feels like it should demand a factory floor and a team of engineers, yet that barrier has quietly dropped further than most people realize.
The part has real weight to it. A cool heft, a solid ring when you tap it, none of that plastic-pretending-to-be-metal feeling.
In this guide, I’ll walk you through why metal printing is worth exploring and the methods that make it possible. We’ll cover the materials, the tools, and the whole path from a design on your screen to a finished metal object in your hand.
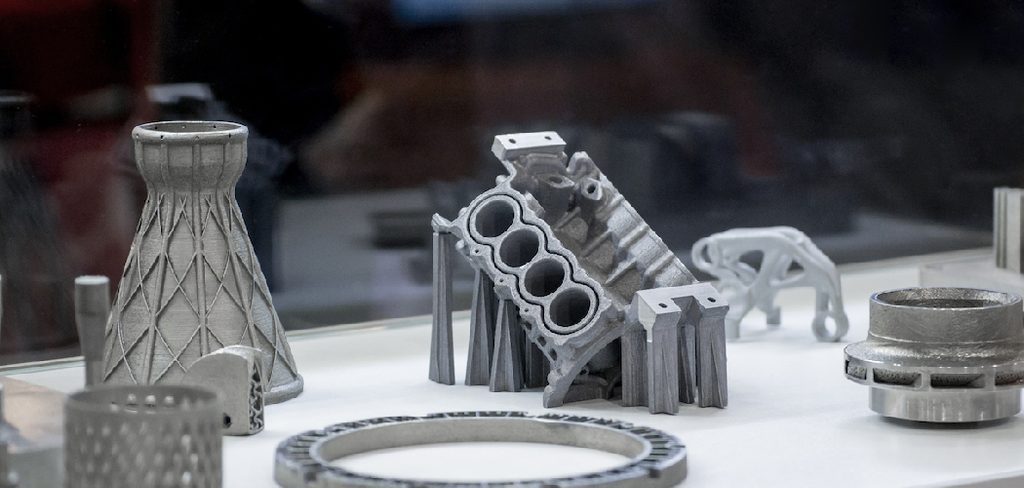
Some routes cost very little. Others are firmly industrial. There’s a path here for almost any goal, so let’s find yours.
Why 3D Printing Metal Matters
Before you wrestle with furnaces and fine powder, it’s fair to ask what the payoff actually is. Metal printing isn’t just a party trick. It solves problems that plastic and even traditional machining tend to struggle with.
Knowing those payoffs helps you decide whether it’s worth your time and effort.
Strength and Durability Beyond Plastic
This is the obvious draw. Metal parts handle heat, stress, and load in ways plastic simply can’t match.
Where a printed plastic bracket might soften near an engine or crack under real weight, a metal one holds firm. That opens the door to serious functional projects, the kind you’d otherwise have to buy or send off to a machine shop.
Complex Geometries Made Possible
Here’s where printing genuinely outshines a lathe or mill. It builds intricate shapes, internal channels, and lightweight lattices that traditional methods find awkward or downright impossible.
You can hollow out a part to shed weight while keeping its strength intact. Or route a cooling channel straight through the middle of a solid block. That kind of freedom tends to reshape how you approach a design from the start.
Rapid Prototyping and Custom Parts
Then there’s speed. Makers and small businesses can turn an idea into a real metal component without expensive tooling or weeks of waiting.
Need a one-off replacement part that nobody sells anymore? Print it. Testing three versions of a bracket before you commit? Print all three. That flexibility is hard to overstate once you start iterating on your own designs.
Understanding the Types of Metal 3D Printing
There isn’t one way to print metal. There are several, and they vary wildly in cost, complexity, and the results they deliver. Picking the right one for your goals matters more than almost anything else.
Here’s how the main methods break down.
DMLS and SLM
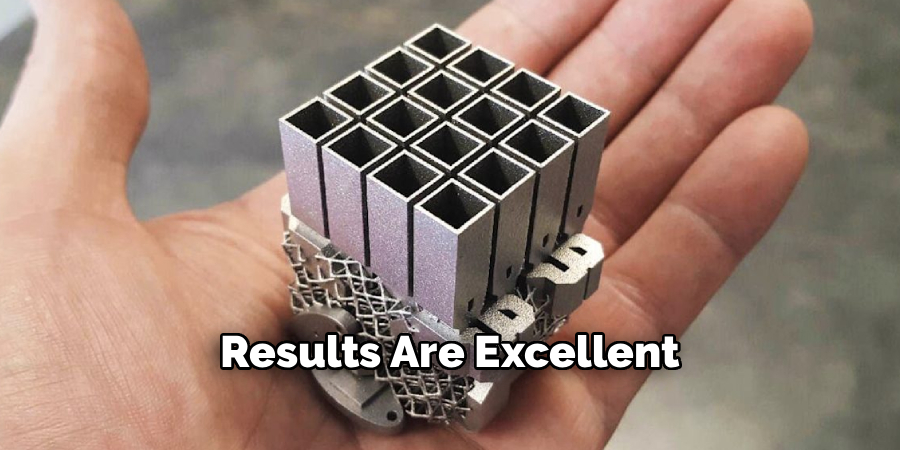
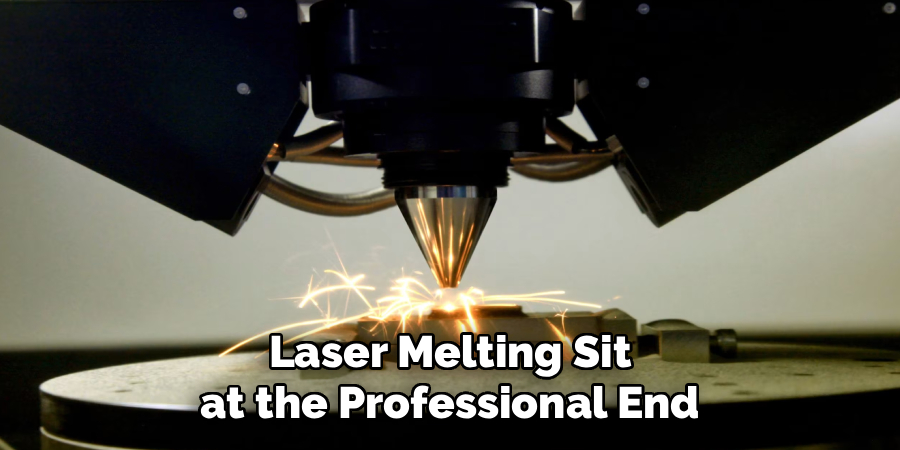
Direct metal laser sintering and selective laser melting sit at the professional end. A laser fuses fine metal powder, one thin layer at a time, building up a dense and genuinely strong part.
The results are excellent, which is why aerospace and medical fields lean on them. The catch is the machinery, which costs more than most homes. This is service-bureau territory rather than something for the garage.
SLA-Style Metal Resin Printing
Some resin-based systems print with metal-filled material, which then gets sintered afterward to burn off the binder and fuse the metal together. It’s an interesting middle path.
The appeal here is fine detail. Resin captures crisp features beautifully, so this route tends to suit smaller components where precision matters more than raw size.
FDM With Metal-Filled Filament
Here’s the one most hobbyists can actually try today. An ordinary FDM printer extrudes filament packed with metal powder, giving you a real taste of metal printing on a modest budget.
Straight off the printer, these parts feel metallic but aren’t fully solid metal. For truly dense results, they still need debinding and sintering. Even so, it’s easily the most approachable entry point out there.
Bound Metal Deposition and Beyond
Newer systems print parts made of metal powder held together with a binder. The resulting green part gets washed and sintered, transforming into solid metal along the way.
These machines bridge the gap between desktop convenience and industrial quality. They aren’t cheap, but they’ve put real metal parts within reach of small shops in a way that wasn’t true a few years back.
Materials and Tools You Will Need
Once you’ve settled on a method, you’ll need gear to match. Metal printing asks for a bit more preparation than plastic, and some of it demands genuine care.
Here’s a practical rundown to work from.
Common Metal Materials
Your material choice shapes the whole project. Stainless steel is the reliable workhorse, tough and resistant to corrosion. Titanium offers real strength at a low weight, which explains its popularity in aerospace.
Aluminum suits lighter parts that still need durability, and bronze brings a warm look alongside decent wear resistance. Each fits different jobs, so match the metal to what the part actually has to endure.
The Right Printer for Your Method
The equipment ranges enormously. On the affordable end, an FDM machine with a hardened nozzle handles metal-filled filament nicely, since those abrasive particles chew through soft brass nozzles fast.
At the far end sit specialized industrial systems for DMLS or bound metal work. Most people starting out will rely on filament at home and turn to a service for anything denser.
Safety and Handling Gear
This part isn’t optional. Fine metal powder and sintering fumes carry real risks, so gloves, a proper respirator, and good ventilation belong on your list from day one.
Metal powder in particular deserves respect. It’s not something to handle casually, so treat the safety gear as part of the process rather than an afterthought.
How to 3D Print Metal: Step-by-Step Guide
Here’s the heart of it. Knowing how to 3D print metal really comes down to following a clear sequence rather than any single clever trick. Work through these eight steps in order, since each leans on the one before it.
Take your time, especially with the heat-based stages near the end. Rushing those tends to ruin an otherwise solid part.
Step 1: Choose Your Method and Material
Start by matching your goal, budget, and equipment to the right process. FDM with metal filament for a home experiment, or a DMLS service for dense, high-strength results.
This first choice shapes every step that follows, so give it real thought. Everything else flows out of this decision.
Step 2: Design or Prepare Your Model
Next, create or source a model built with metal printing in mind. Think about wall thickness, overhangs, and the shrinkage that sintering will bring.
A design that ignores these tends to fail expensively later on. A solid, printable model up front saves you a lot of grief down the line.
Step 3: Set Up Your Slicer Correctly
Import the model and choose settings tuned for your process. Metal-filled filament, for instance, usually wants slower speeds and the right temperature to flow cleanly.
Proper supports matter here too. A few minutes spent dialing in the slicer prevents a whole cascade of problems during the print itself.
Step 4: Print or Submit Your Part
Now run the print on your machine, or send the file off to a metal printing service. FDM users should watch those first layers closely, since a bad start dooms the entire print.
Using a service instead? Confirm your specs and material before you submit. Catching an error now is far cheaper than discovering it after they’ve quoted and begun.
Step 5: Debind the Printed Part
Metal-filled prints usually need debinding, a stage that removes the plastic binder holding the metal together. Depending on the system, this happens through a chemical or thermal process.
Think of it as clearing away the scaffolding. The part turns fragile at this point, so handle it gently as you prepare it for the furnace.
Step 6: Sinter for Full Strength
Sintering is where the real transformation happens. The part heats in a furnace until the metal particles fuse into a solid, dense piece.
This is the moment a delicate print becomes a genuine metal object. Expect some shrinkage as it densifies, which is precisely why your design accounted for it earlier.
Step 7: Inspect and Verify the Result
Once it’s cooled, examine the finished part carefully. Check for dimensional accuracy, cracks, or any warping that crept in during sintering.
Compare it against your original design. If something drifted, jot it down for next time, since metal printing rewards learning from each attempt.
Step 8: Move On to Finishing
Finally, head toward post-processing to clean up and refine the surface. We’ll get into that in a moment.
For now, take a second to appreciate what you’re holding. A metal part you helped bring into existence is a genuinely satisfying thing to turn over in your hands.
Design Considerations for Metal Prints
Thoughtful design does more for a metal print than almost any setting ever could. Because the process involves heat, shrinkage, and fragile intermediate stages, what you draw really matters.
A little planning here spares you a lot of failed parts.
Wall Thickness and Structural Support
Walls that are too thin can warp or fail during sintering, when the part sits at its most vulnerable. Give your design enough substance to survive the heat.
At the same time, smart internal structures keep parts light without giving up strength. It’s a balance, and finding it comes partly with practice.
Planning for Shrinkage
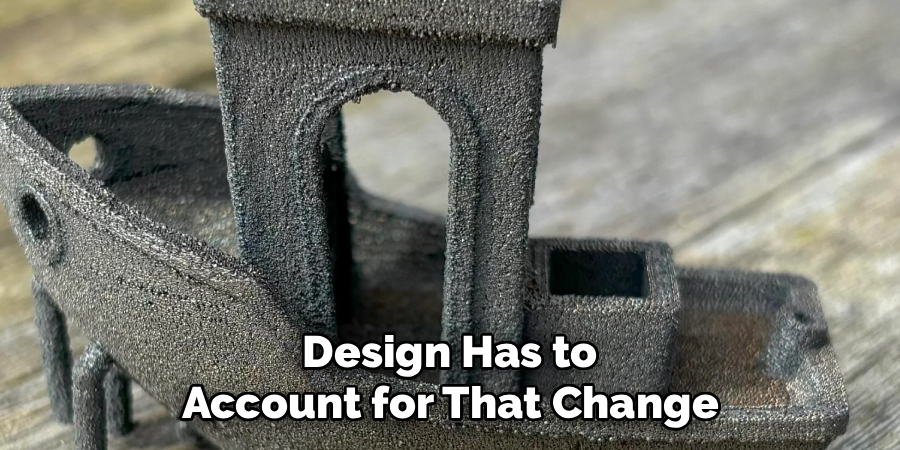
Sintering shrinks parts, and it does so fairly predictably. So your design has to account for that change to land on the final dimensions you actually want.
Ignore it, and a part that measured perfectly on screen comes out undersized. Most workflows come with known shrinkage rates, so build them in from the very beginning.
Minimizing Overhangs and Supports
Steep overhangs invite trouble, both during printing and through the heat stages. Reducing them limits the support material you need and lowers the odds of a defect.
Where you can, orient and shape the model so it supports itself. Every support you avoid is one less thing to remove and one less spot for a flaw to hide.
Post-Processing Your Metal Prints
A raw metal print rarely looks finished. Post-processing is what turns it into something polished and professional, and honestly, it’s often more enjoyable than you’d expect.
Here’s how to take it the rest of the way.
Removing Supports and Cleaning Up
Start by carefully removing any supports and cleaning the surface. Metal supports tend to be tougher than plastic ones, so patience and the right tools go a long way.
Work slowly around delicate features. A rushed cut here can nick the part you spent so much effort making.
Machining and Surface Finishing
For tighter tolerances or a smoother look, light machining works wonders. Sanding, polishing, or a quick pass on a mill can sharpen critical dimensions and refine the surface.
This is where a printed part starts to feel truly manufactured. A polished metal surface carries a quality that raw print layers just can’t match.
Coating and Protecting the Surface
Depending on the metal and its use, a protective step may be worth the effort. Plating, sealing, or heat treatment can improve appearance, corrosion resistance, and strength.
An outdoor part especially benefits from protection against the elements. It’s a small bit of work that extends the life of your creation considerably.
Common Mistakes to Avoid
Everyone stumbles a little when they start printing metal. These missteps show up often, and each is easy to sidestep once you know it’s coming.
No judgment here. The learning curve is genuinely real.
Skipping Proper Safety Precautions
This is the one you can’t afford to get wrong. Fine metal powder and sintering fumes pose actual risks, so protective gear and ventilation simply aren’t negotiable.
Treat the safety steps with the same seriousness as the printing. Your lungs will thank you later.
Ignoring Shrinkage and Tolerances
Forgetting to account for sintering shrinkage leaves you with parts that miss their target dimensions. It’s a frustrating way to waste both time and material.
Build the shrinkage into your design from the start. That’s far easier than trying to correct for it once the part is out of the furnace.
Choosing the Wrong Method for the Job
Matching the process to the project prevents a lot of wasted effort. An ambitious industrial part won’t come from a filament printer, and a simple prototype rarely justifies a costly service.
Think honestly about what the part actually needs. The right method saves money, time, and frustration all at once.
Frequently Asked Questions
A few questions come up again and again once people start exploring metal printing. Here are honest answers.
Can I 3D Print Metal at Home?
To a point, yes. FDM with metal-filled filament is genuinely home-friendly, and it gives you a real feel for the process.
For dense, fully solid parts, though, you’ll need sintering, which usually means a service or specialized equipment. So home printing gets you started, while industrial results often call for outside help.
How Strong Are 3D Printed Metal Parts?
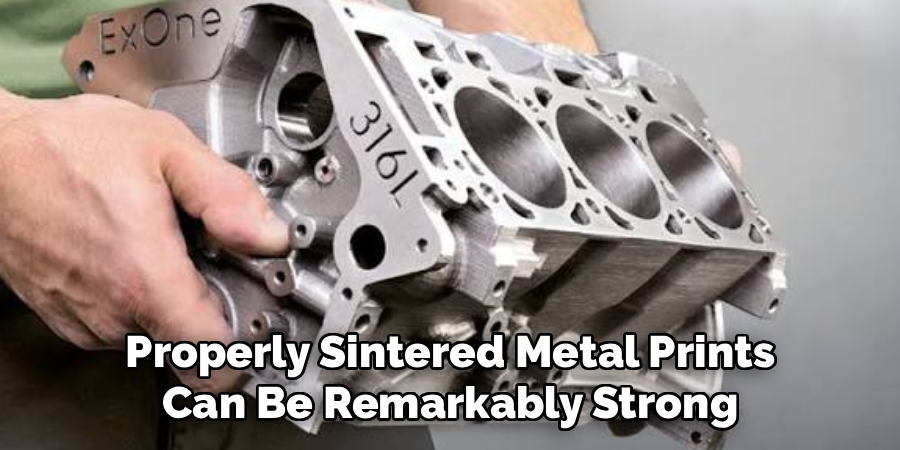
Properly sintered metal prints can be remarkably strong, edging close to traditionally made parts. The results tend to depend heavily on the method and the material.
A well-processed titanium or steel part performs impressively. A poorly sintered one, less so. Care throughout the whole process shapes the outcome.
Is Metal 3D Printing Expensive?
It ranges widely. Metal-filled filament experiments cost relatively little, while industrial DMLS work can climb into serious money.
There’s genuinely an option for most budgets, though. You don’t have to jump straight to the expensive end to get your feet wet.
Conclusion
Learning how to 3D print metal opens a world of strong, custom, and genuinely intricate parts that once felt out of reach. And the path is clearer than it first appears.
It follows a sensible sequence. Choose your method and design smartly, then print, debind, sinter, and finish the final piece with care.
A few habits carry you through it all. Plan for shrinkage, put safety first, and match the process to the project rather than forcing a mismatch.
So start small, with an approachable project that lets you learn the rhythm before you tackle anything ambitious. Metal-filled filament or a printing service are both fine ways in.
There’s a real thrill in holding a metal part you brought to life yourself. Give it a try, and see where it takes you.

About
Zevric Halden is a dedicated expert in the world of 3D printing, printer repair, and additive manufacturing, with years of hands-on experience troubleshooting, maintaining, and optimizing desktop 3D printers. His professional focus lies in combining practical mechanical knowledge with modern 3D printing technologies to help users solve printer problems, improve print quality, and keep their machines running reliably. As the author of 3DMend, Zevric explores the technical side of 3D printing, making complex printer issues easier to understand for makers, hobbyists, and professionals alike.
Education
Rochester Institute of Technology
(Rochester, New York, USA)
Associate Degree in Mechanical & Manufacturing Technology
- Focused on mechanical systems, manufacturing processes, machine maintenance, and precision tools.
- Developed practical experience with mechanical troubleshooting, electronic components, and computer-controlled equipment.
- Gained hands-on knowledge of CAD systems, rapid prototyping, and additive manufacturing technologies.
Worcester Polytechnic Institute
(Worcester, Massachusetts, USA)
Bachelor’s in Mechanical Engineering & Additive Manufacturing
- Specialized in digital fabrication, 3D printing systems, mechanical design, and manufacturing technologies.
- Studied printer calibration, motion systems, extrusion mechanisms, material behavior, and print optimization.
- Participated in practical engineering projects involving rapid prototyping, machine diagnostics, and 3D-printed components.
Publications and Impact
Through 3DMend, Zevric shares his expertise on 3D printer troubleshooting, maintenance, calibration, hardware repair, print-quality issues, and additive manufacturing. His writing focuses on turning frustrating printer problems into clear, practical solutions that readers can understand and apply.
From nozzle clogs and extrusion problems to bed-leveling issues, calibration errors, overheating, unusual noises, failed prints, and mechanical wear, Zevric’s guides are designed to help users identify the underlying cause rather than simply treating the symptoms.
His work bridges the gap between technical engineering knowledge and everyday 3D printing, making reliable repair and maintenance information accessible to everyone—from first-time 3D printer owners and hobbyists to experienced makers and professionals.