

You need a part that can sit outdoors and survive. Full sun, an afternoon downpour, the kind of heat that makes cheaper filaments soften or fade within a season.
That’s the moment most makers start eyeing ASA. Learning how to print ASA opens the door to parts that hold up where PLA and even PETG would quietly give in.
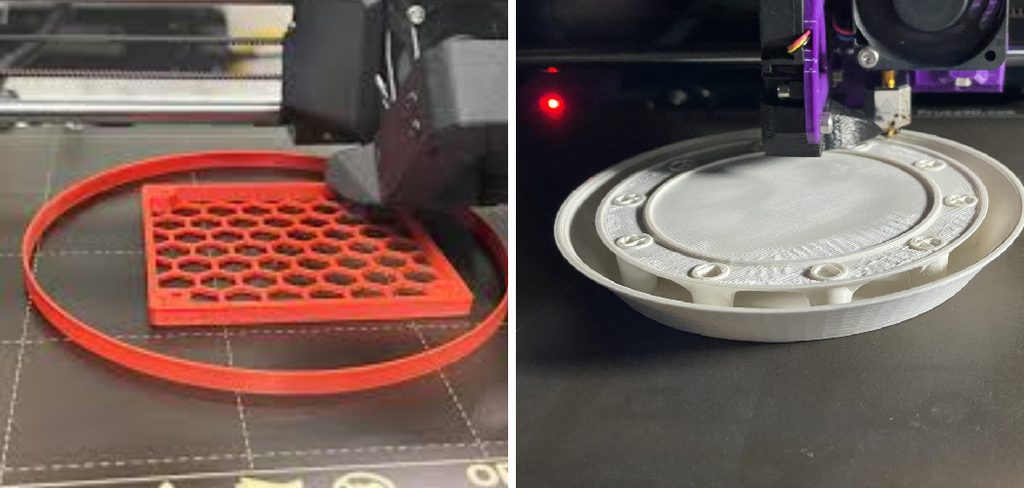
It has a reputation for being finicky, and there’s some truth to that. But the difficulty is manageable once you understand what ASA actually wants from you.
In this guide, I’ll walk you through why ASA is worth the effort, how it differs from ABS, and the exact settings and gear you’ll need. Then we’ll get into a step-by-step process, plus warping fixes and post-processing. By the end, ASA should feel far less intimidating.
Why Print With ASA
Before you wrestle with enclosures and temperatures, it helps to know what you’re getting for the trouble. ASA earns its place through some genuinely useful properties.
These are the reasons people reach for it despite the extra fuss.
Excellent UV and Weather Resistance
This is ASA’s headline feature. It shrugs off sunlight, rain, and temperature swings in a way most filaments simply can’t.
That makes it a natural fit for outdoor and automotive parts. Where PLA yellows and grows brittle in the sun, ASA holds its color and strength for years. If a part lives outside, ASA is often the sensible answer.
Strong, Durable, and Heat-Tolerant
Beyond weather, ASA is genuinely tough. It handles mechanical stress well and stays stable in warm conditions that would leave PLA sagging.
Leave a PLA part in a hot car, and you may find it warped by evening. ASA tolerates that heat far better, which matters more than people expect for everyday functional prints.
A Smooth, Professional Finish
There’s an aesthetic bonus too. ASA prints with an attractive matte surface that looks polished right off the bed.
It also takes post-processing beautifully, which we’ll cover later. That combination of durability and good looks is part of why it appeals to people making finished products rather than quick prototypes.
ASA vs ABS: Key Differences
ASA and ABS are close cousins, and the comparison comes up constantly. They share a lot of DNA, so knowing where they diverge helps you choose confidently.
The differences are subtle but meaningful.
Similar Strength, Different Weather Performance
Both filaments offer excellent toughness, and in raw strength they’re comparable. Where they part ways is outdoors.
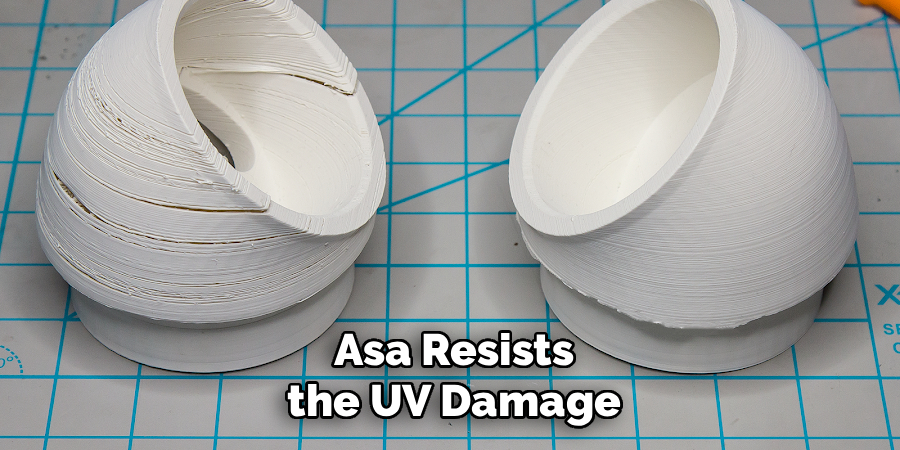
ASA resists the UV damage and yellowing that quickly age exposed ABS parts. An ABS print left in the sun tends to fade and grow brittle, while ASA keeps its color and integrity. That single difference decides many projects on its own.
Printing Behavior and Fumes
ASA prints much like ABS, which is to say it needs heat and care. Many makers actually find ASA slightly easier to manage, with a bit less warping temperament.
Both release fumes while printing, though, and that’s not something to ignore. Good ventilation isn’t optional with either material, so plan for it regardless of which you choose.
When to Choose One Over the Other
So how do you decide? ASA wins clearly for anything living outdoors, thanks to that UV resistance.
ABS may still suit indoor prototypes where cost matters more than sun exposure, since it often runs a touch cheaper. But for outdoor durability, ASA is usually worth the small premium.
Tools and Settings You Will Need
Gathering the right gear first saves a lot of mid-print frustration. ASA asks for a bit more preparation than easy filaments, so a quick checklist helps.
None of it is exotic, but each piece matters.
Recommended Hardware
Start with an all-metal hotend, since ASA’s temperatures can soften cheaper heat breaks over time. A heated bed is essential too, not optional.
An enclosure rounds out the list. It keeps the print environment warm and stable, which for ASA makes the difference between a clean part and a cracked one. We’ll get deeper into why shortly.
Baseline Temperature Settings
For settings, ASA typically prints around 240 to 260 degrees Celsius at the nozzle. The bed usually wants somewhere between 90 and 110 degrees.
These are starting points rather than fixed rules. Different brands vary, so expect to fine-tune within these ranges once you see how your first test behaves.
Adhesion and Safety Supplies
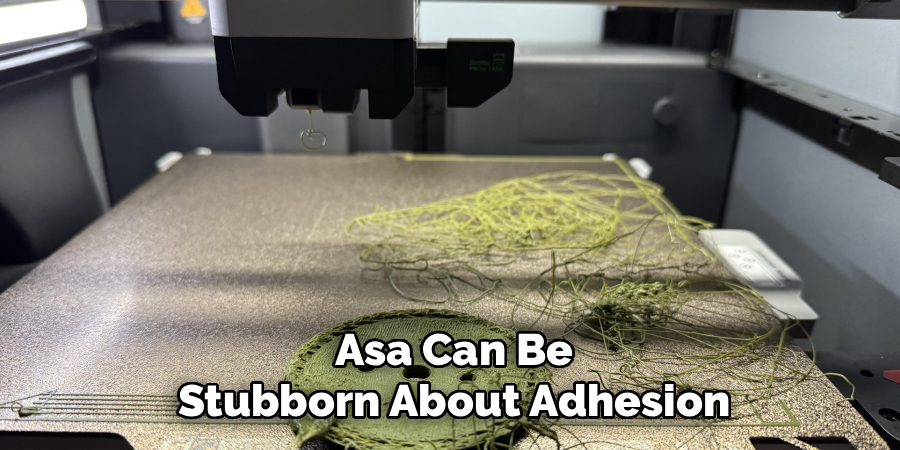
For bed grip, a glue stick or an ASA slurry helps that first layer hold firmly. ASA can be stubborn about adhesion, so a little help goes a long way.
Then there’s ventilation gear. Since ASA gives off fumes, decent airflow or a filtered enclosure keeps the work comfortable and safe.
Printer Requirements for ASA
Not every machine is ready for ASA out of the box. Confirming your printer can handle it spares you a string of frustrating failures.
A few components matter more than the rest.
A Reliable Heated Bed
Your bed needs to reach and, more importantly, hold high temperatures. ASA relies on that heat to keep the first layer stuck and stable.
A bed that struggles to maintain 90 or 100 degrees will let prints lift and curl. Consistency here is what keeps the foundation solid throughout a long print.
An All-Metal Hotend
ASA’s higher printing temperatures demand a hotend built for sustained heat. A hotend with a PTFE liner near the nozzle may degrade at these temperatures over time.
An all-metal design handles the load without softening or off-gassing. If you plan to print ASA regularly, this is one upgrade worth making before you start.
Consistent Temperature Control
Beyond individual parts, ASA wants steady heat across the whole process. Well-regulated temperatures prevent the cracking and curling the material is known for.
Fluctuations are the enemy. A printer that holds its temperatures reliably, without wild swings, gives ASA the stable conditions it needs to bond layer to layer.
Why an Enclosure Matters
If there’s one thing that separates clean ASA prints from cracked disappointments, it’s the enclosure. This deserves its own section because people underestimate it constantly.
Controlling the environment is genuinely the secret here.
Blocking Drafts and Cold Air
ASA hates uneven cooling. A stray breeze from an open window or an air vent cools one part of the print faster than another.
That uneven cooling causes warping, splitting, and weak spots. An enclosure blocks those drafts, keeping the temperature around the print consistent. It’s a simple barrier with an outsized effect.
Maintaining a Warm, Stable Chamber
Beyond blocking drafts, an enclosure traps the heat the print itself gives off. That keeps the whole chamber warm and even.
When every part of the print stays at a similar temperature, the layers bond strongly and shrink uniformly. That uniformity is what prevents the cracks that plague ASA in open air.
Enclosure Options for Any Budget
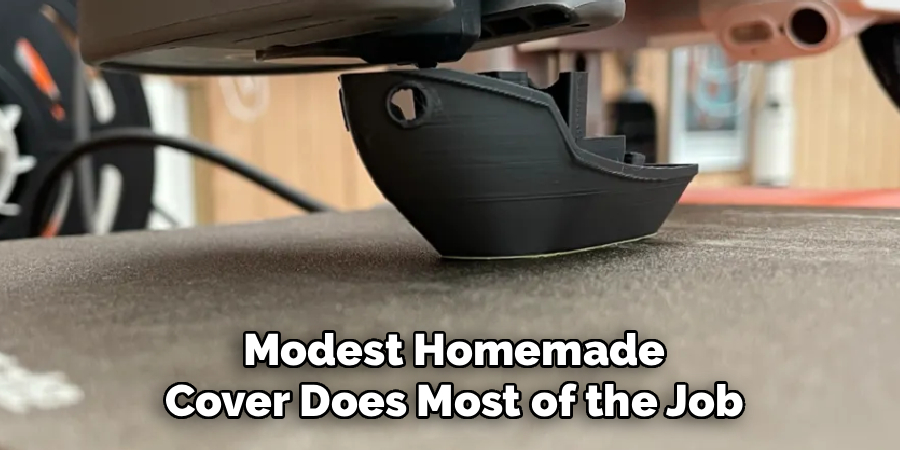
The good news is that an enclosure needn’t be expensive. Solutions range from a simple DIY cardboard box or a photo tent to a dedicated enclosed printer.
Even a modest homemade cover does most of the job. So don’t let the word “enclosure” scare you off. There’s a path here for nearly any budget.
How to Print ASA: Step-by-Step Guide
Here’s the heart of it. Once you understand how to print ASA step by step, the whole process feels far more approachable. Work through these eight stages in order, since each builds on the last.
Take your time, especially with the early preparation. Rushing ASA tends to end in a warped, cracked mess.
Step 1: Dry Your ASA Filament
Start here, before anything else. Dry your spool in a filament dryer or a low oven, since ASA absorbs moisture from the air.
Damp filament causes bubbling, poor layer quality, and weak, brittle parts. No printing setting fully fixes that, so drying comes first. It’s an easy step to skip and a costly one to miss.
Step 2: Set Up an Enclosure and Ventilation
Next, enclose the printer to trap warmth while still venting the fumes safely. This balance matters.
A stable, warm chamber keeps the print happy, and good airflow keeps you comfortable. Position the ventilation so it clears fumes without blowing cold air directly across the print, which would defeat the enclosure’s purpose.
Step 3: Prepare and Level the Bed
Now turn to the bed. Clean it thoroughly, apply your adhesive helper, and level it carefully.
ASA fights adhesion harder than most filaments, so a well-prepped, level surface gives it the grip it needs. A clean bed with a thin layer of glue stick or slurry does a lot to stop that first layer from lifting.
Step 4: Dial In Your Temperatures
With the bed ready, set your temperatures. Aim for a nozzle around 240 to 260 degrees and a bed near 90 to 110 degrees, then fine-tune with a small test.
Getting this balance right prevents both under-extrusion and cracking. Too cool and the layers won’t bond; too hot and you invite other problems. A quick calibration print reveals your material’s sweet spot.
Step 5: Slow Down and Reduce Cooling
Here’s where ASA differs sharply from PLA. Lower your print speed and turn the part cooling fans way down, or off entirely.
ASA bonds best with minimal cooling. Aggressive fans cool the plastic too fast, which causes layer splitting and curling. It feels counterintuitive after printing PLA, but keeping the layers warm is exactly what ASA needs.
Step 6: Print the First Layer Carefully
The first layer sets the tone for everything above. Watch it go down and confirm it’s smooth, flat, and firmly stuck.
A strong foundation anchors the whole print and dramatically lowers the risk of lifting later. If that first layer looks patchy or won’t adhere, it’s better to stop and re-level than to gamble on the rest.
Step 7: Monitor and Adjust During Printing
Once the print is underway, check in periodically. Look for early signs of warping, gaps, or splitting.
Catching a problem partway through lets you pause and tweak before hours of filament go to waste. A stray draft or a corner starting to curl is much easier to address early than after the fact.
Step 8: Cool Down Slowly Before Removal
When the print finishes, resist the urge to yank it out. Let the print and the chamber cool gradually before opening the enclosure.
A sudden temperature drop can crack or warp an otherwise perfect part. Once it’s cooled slowly, remove the print gently and note the settings that worked. That last bit of patience protects all your effort.
How to Prevent Warping With ASA
Warping is ASA’s biggest challenge, so it’s worth tackling head-on. A few smart habits keep those corners flat and your prints intact.
Most of it comes down to controlling heat and adhesion together.
Keep the Environment Warm and Draft-Free
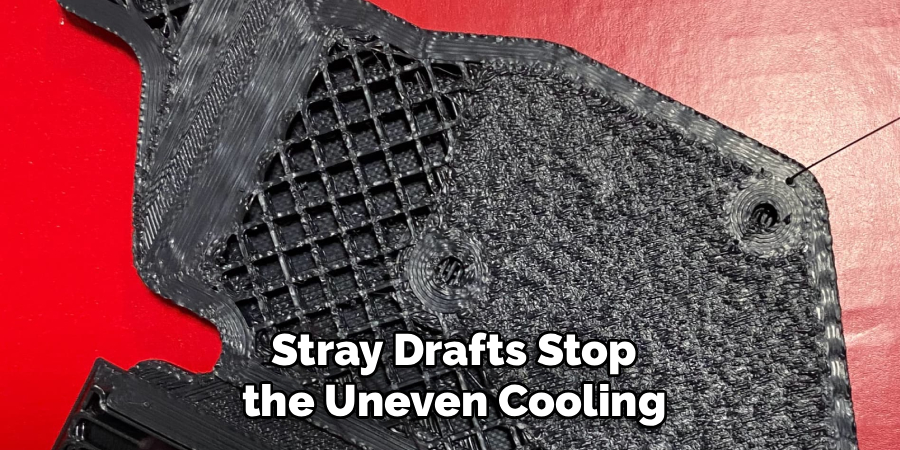
We’ve said it, but it bears repeating. A stable enclosure and the absence of stray drafts stop the uneven cooling that curls corners.
If you notice warping despite everything else, check for a hidden draft first. An open door across the room can be enough to cool one side faster than the other.
Boost First-Layer Adhesion
A print that stays anchored can’t warp upward. So a clean, heated bed with glue or ASA slurry, plus a brim or raft, locks the base firmly in place.
The brim especially helps with warp-prone corners, giving them extra grip to resist lifting. It adds a little cleanup, but it’s a fair trade for a flat part.
Minimize Part Cooling
Turning the cooling fans down keeps each layer hot enough to bond properly to the one below. That reduces both splits and lifting.
It’s the same principle from the printing steps, applied specifically to warping. Less cooling means slower, more even contraction, which is exactly what ASA wants.
Post-Processing ASA Prints
One of ASA’s quiet strengths is how well it finishes. Once a print is off the bed, you can take it further with a few techniques.
Each one adds a different kind of polish.
Sanding for a Smooth Surface
Start with sanding if you want to erase layer lines. Progress through the grits, from coarse to fine, to soften the surface gradually.
That preps the part for painting or polishing. Patient sanding turns a good ASA print into one that looks genuinely manufactured, and the material takes it well.
Acetone Vapor Smoothing
Here’s a trick ASA shares with ABS. It responds to acetone vapor smoothing, which melts the surface just enough to blend the layers into a glossy, sealed finish.
Keep exposure short and ventilation strong, since acetone fumes are no joke. Done carefully, this delivers a smooth shine that sanding alone struggles to match.
Painting and Sealing for the Outdoors
For parts headed outside, painting adds both color and protection. Prime the surface first, then apply a UV-stable paint.
That extra layer shields the print and lets you match any look you want. Since these parts often live in the sun, a quality outdoor sealer is a worthwhile final touch.
Common ASA Printing Mistakes to Avoid
Everyone stumbles a little when they start with ASA. These are the missteps I see most, and each is easy to sidestep once you know it’s coming.
No judgment here. ASA has a learning curve.
Printing in a Cold or Drafty Space
This is the classic error. Skipping an enclosure, or printing near an open window, invites warping and splitting almost immediately.
ASA simply won’t cooperate in an unstable environment. If your prints keep cracking, the surrounding air is the first thing to examine.
Running Cooling Fans Too High
Coming from PLA, people leave the fans blasting out of habit. With ASA, that’s a problem.
Strong part cooling causes the layers to separate, weakening the whole print. Dial those fans down, and a lot of mysterious splitting disappears.
Ignoring Filament Moisture and Ventilation
Two things get overlooked at once here. Wet ASA prints poorly, so drying matters more than people assume.
And the fumes make good airflow non-negotiable. Neglecting either one leads to weak prints or an uncomfortable workspace, neither of which you want.
Frequently Asked Questions
A few questions come up again and again once people start with this material. Here are honest answers.
Is ASA Harder to Print Than PLA?
Yes, somewhat. ASA needs more heat, an enclosure, and proper ventilation, none of which PLA requires.
That said, “harder” doesn’t mean “hard.” With the right setup, ASA becomes very manageable. Most of the difficulty is in the preparation, not the printing itself.
Do I Really Need an Enclosure for ASA?
In practice, yes. An enclosure dramatically reduces warping and cracking by keeping the environment warm and stable.
You might get away without one in a very still, warm room, but it’s a gamble. For reliable results, an enclosure is strongly recommended, even a simple homemade one.
Are ASA Fumes Dangerous?
ASA does release fumes while printing, so they shouldn’t be ignored. A well-ventilated space or a filtered enclosure keeps things safe.
Treat it sensibly. Print in a room with airflow rather than a sealed closet, and you’ll keep the work comfortable without much fuss.
Conclusion
Learning how to print ASA lets you create tough, weather-ready parts that hold up beautifully in sun, rain, and heat where other filaments quietly fail. The reputation for difficulty fades once you understand what the material actually needs.
Success comes from a clear sequence. Dry the filament, set up an enclosure, dial in your temperatures, slow down the cooling, and let everything cool gradually before removal.
A few habits carry you the rest of the way. Keep the chamber warm and draft-free, boost first-layer adhesion, and always ventilate for safety.
So start with a small model to build confidence before tackling big outdoor projects. Get the enclosure and drying sorted, then run your first test. There’s a real satisfaction in holding a durable ASA print you know will still look good years from now, out in the weather where it belongs.

The 3D Mend team — we print, we fail, we work out why, and we write it down. Every guide here started as something that went wrong on one of our own machines.