

You lift a fresh print off the bed, and instead of clean lines, you find thin threads bridging every gap. They cling to the corners like cobwebs, and suddenly your crisp model looks a little tired.
It’s a small letdown, but a common one. The print itself came out fine. It just needs a bit of cleanup you’d rather skip.
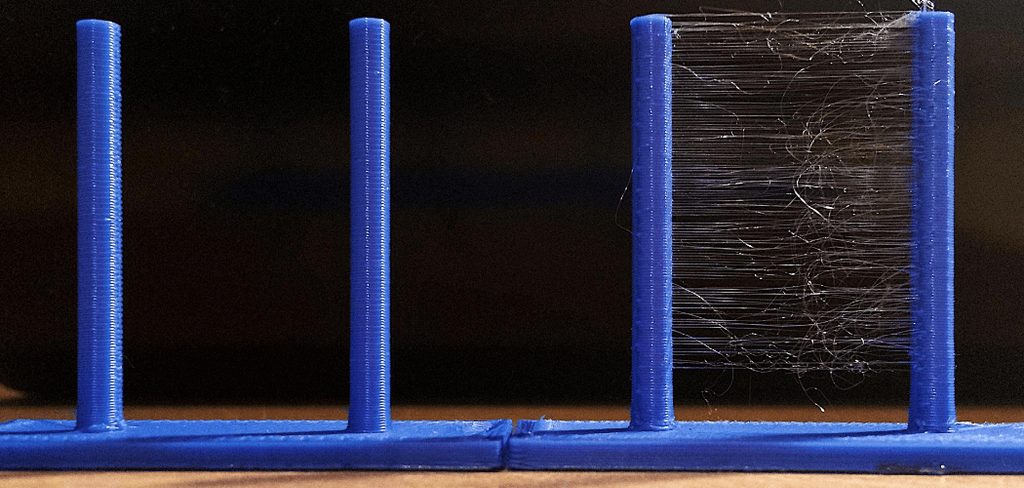
Here’s the encouraging part. Learning how to reduce stringing PLA is easier than those threads suggest, and most of the fix lives in a handful of settings. A broken machine is rarely to blame.
In this guide, I’ll walk you through what causes PLA stringing in the first place. Then we’ll cover the tools worth having and a step-by-step process to clear it up. By the end, you should be pulling clean prints off the bed with almost nothing to trim.
What Causes Stringing in PLA Prints
Before you start changing settings at random, it helps to understand where those threads come from. Stringing isn’t a mystery once you know the mechanics behind it.
Nearly every case traces back to one of four culprits. Sometimes a couple of them work together.
Filament Oozing During Travel Moves
Here’s the root of it. When the printhead jumps between two separate areas, the nozzle is still full of hot, molten PLA.
That soft plastic wants to escape. As the head crosses an open gap, a little leaks from the tip and stretches into a thin strand behind it. Repeat that across hundreds of travel moves, and you get a print draped in threads.
Nozzle Temperature Set Too High
Heat plays a large role here. A nozzle running hotter than it needs to keeps PLA runny and eager to flow.
Runny filament drips more readily during those travel moves. Drop the temperature a bit, and the plastic firms up just enough to stay put. It’s often the single most effective change you can make.
Weak or Missing Retraction
Retraction is your printer’s built-in defense against oozing. It pulls filament back slightly before a travel move, easing the pressure at the nozzle.
When retraction is off, disabled, or badly tuned, that pressure lingers. So the filament keeps seeping out mid-travel. Dialing this in properly solves a big share of stringing problems.
Moisture in the Filament
This one catches people off guard. PLA seems dry, but it slowly absorbs water from the air, and damp filament misbehaves.
When wet plastic hits the hot nozzle, the trapped moisture turns to steam and sputters out. That sizzling creates extra oozing and stringing no setting can fully cure. A moisture-soaked spool is a surprisingly frequent hidden cause.
Understanding the Types of PLA Stringing
Not all stringing looks the same, and the differences tell you something useful. Take a moment to look closely before you touch anything.
What you see points you toward the likely cause. That saves you from guessing blindly.
Fine Wispy Threads
These are the light, hair-thin strands that brush away with a fingertip. They’re barely there, honestly.
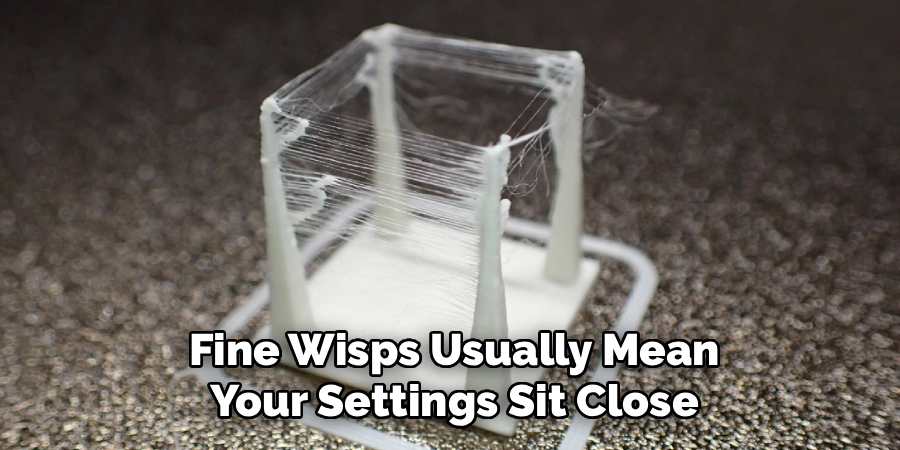
Fine wisps usually mean your settings sit close, just not quite dialed in. A small temperature drop or a minor retraction tweak often clears them completely.
Thick, Sticky Strands
Heavier threads are a different story. When the strands feel substantial and cling hard, something bigger is off.
Thick stringing typically signals a nozzle that’s too hot or retraction that’s missing or poorly tuned. These take more than a nudge, but they’re still very solvable with patience.
Blobs and Zits Paired With Stringing
Sometimes you’ll spot small bumps on the surface alongside the threads. Those little zits tend to travel with stringing.
The reassuring part is that they usually share the same causes. Fix the temperature and retraction for the strands, and the blobs often clear up right along with them.
Tools and Materials You Will Need
The nice thing about this fix is how little it demands. You probably have most of what you need already.
A few basics will carry you through the whole process without any special shopping trip.
A Stringing Test Model
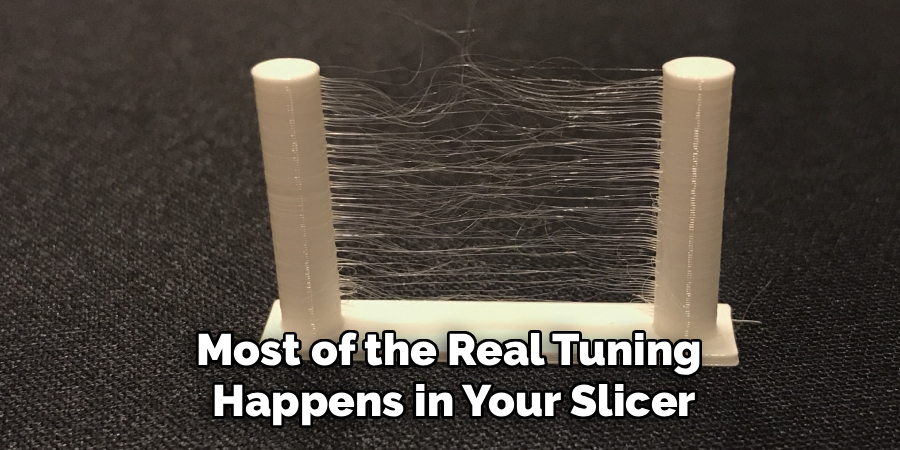
This is your measuring stick. A simple two-tower test print, or a comb-style model, instantly shows whether your changes are working.
The idea is that the printhead travels back and forth across a gap over and over. Any stringing shows up plainly in that open space, so you can compare before and after at a glance.
Slicer Software Access
Most of the real tuning happens in your slicer. Cura, PrusaSlicer, and Bambu Studio all put retraction, temperature, and travel settings within easy reach.
You don’t need anything fancy. Whatever slicer you already use will have every control this guide touches on.
A Filament Dryer or Sealed Storage
Since moisture causes so much trouble, a way to dry filament helps enormously. A dedicated dryer box is ideal, keeping the spool warm and dry as it prints.
If you don’t have one, an airtight container with desiccant keeps PLA dry between jobs. A low oven can work for drying too, carefully. Either way, keeping moisture out prevents an entire category of stringing.
How to Reduce Stringing PLA: Step-by-Step Guide
Here’s the heart of it. Work through these seven steps in order, and change just one thing at a time. That single habit turns troubleshooting into something reliable rather than a shot in the dark.
Print your test model after each change. It’s the only honest way to see what actually helped.
Step 1: Dry Your PLA Filament
Start here, always. Dry your spool in a filament dryer, a sealed box, or a low oven before you touch any settings.
Even PLA holds moisture, and damp filament causes stringing that no amount of tuning can fix. So there’s little point chasing temperature and retraction until you’ve ruled moisture out. This step alone sometimes solves the whole thing.
Step 2: Lower Your Nozzle Temperature
Now drop your nozzle temperature in small steps, around 5 degrees at a time. Reprint your test tower after each drop.
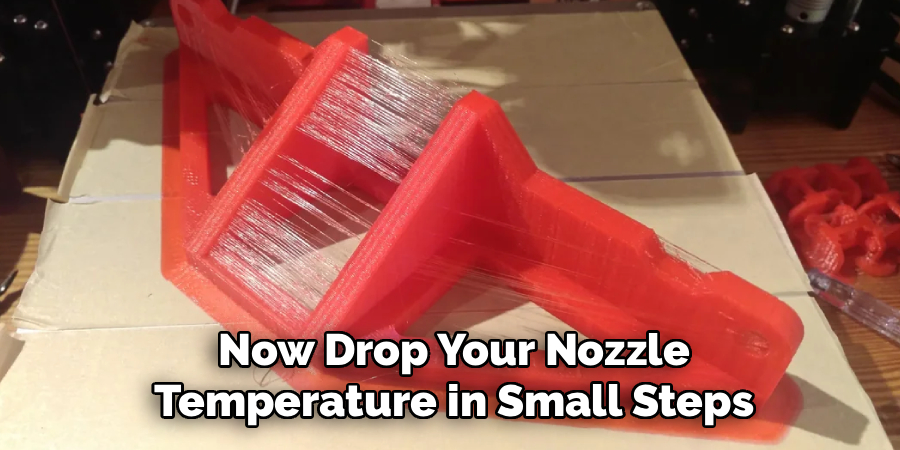
A cooler nozzle keeps the filament firmer, so it oozes far less during travel. Keep lowering until stringing fades but the layers still bond cleanly. Go too far, and you’ll see under-extrusion, so watch for that balance point.
Step 3: Enable and Tune Retraction Distance
If retraction is off, turn it on. Then adjust the distance, which controls how far the filament pulls back before a travel move.
This setting depends heavily on your printer type. Bowden setups, with their long tube between extruder and nozzle, need more distance. Direct-drive machines need far less. Start from your printer’s recommended value and test from there.
Step 4: Adjust Retraction Speed
Distance is only half of retraction. Speed matters too, meaning how quickly the filament gets pulled back.
Aim for a fast, clean pull that clears the pressure at the nozzle before the head moves. Too slow, and oozing sneaks through anyway. Too fast, and you risk grinding the filament. Adjust in small increments and check the result each time.
Step 5: Increase Travel Speed
Here’s a simpler lever. Speed up your travel moves so the printhead crosses gaps faster.
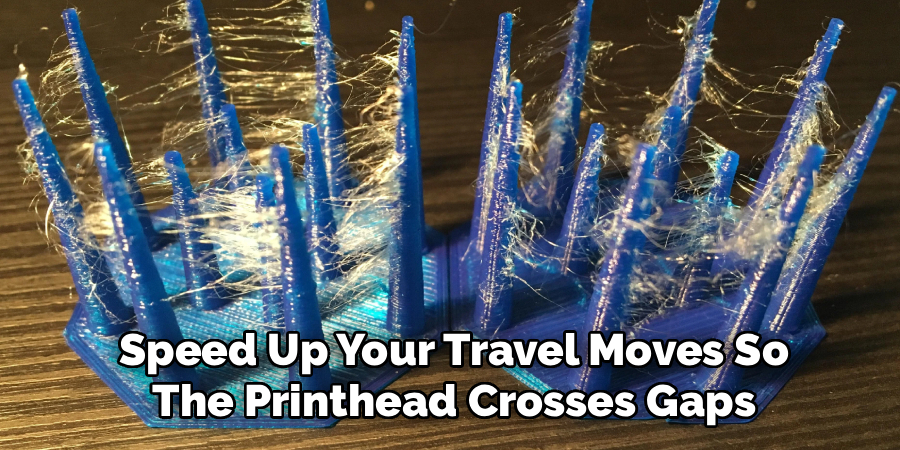
The logic is straightforward. The less time the nozzle spends hovering over open space, the fewer chances oozing plastic has to stretch into a strand. Quicker hops between areas naturally trim the stringing.
Step 6: Turn On Combing, Wiping, and Coasting
Combing keeps travel paths inside the printed area instead of cutting across open gaps. That way, any small ooze lands on the model rather than in visible space.
Wipe and coasting settings help too. They relieve nozzle pressure near the end of a move, so less plastic sits there ready to leak. Together, these features hide and shrink whatever stringing your other tweaks left behind.
Step 7: Run a Test Print and Refine
Finally, tie it all together. Print your stringing test one more time and study the result against your earlier attempts.
If threads still linger, adjust one setting and reprint. Patience wins here. Once the towers come out clean between them, note your winning values and lock them in. You’ve earned that tidy print.
Best Practices for String-Free PLA Prints
A few habits turn a one-time fix into results you can count on. None of them take much effort, and they spare you from re-solving the same problem later.
Mostly, they come down to staying organized and consistent.
Store PLA Properly Between Prints
Since moisture drives so much stringing, protect your spools when you’re not using them. A sealed container with desiccant does the job nicely.
It’s a small habit that heads off a big headache. PLA left out in a humid room slowly soaks up water, and then even dialed-in settings start producing threads again.
Change One Setting at a Time
I keep circling back to this because it matters more than any single tweak. Adjust one thing, then reprint and observe.
When you change several settings at once, and the print improves, you’ve learned nothing about which one helped. Isolating each change turns guesswork into something closer to a real experiment.
Save a Profile for Each PLA Brand
Different filaments want different settings. Even two spools of PLA from separate brands can behave differently.
Once you’ve dialed in a brand or color, save that profile. Next time you load the same spool, you skip the whole tuning process. It feels like overkill until the day it saves you twenty minutes and a stack of test prints.
Common Mistakes to Avoid
Everyone stumbles a little when they start fighting stringing. These are the missteps I see most, and each is easy to sidestep once you know it’s coming.
No judgment here. I’ve made all of them at some point.
Cranking Retraction Too High
When stringing hangs on, the temptation is to keep raising retraction. That often backfires.
Too much retraction can pull molten plastic away and trigger clogs, grinding, or gaps in the print. More isn’t always better. Find the smallest distance that works, rather than the largest you can manage.
Overlooking Filament Moisture
This is the classic trap. People spend hours tweaking temperature and retraction while the real problem is a damp spool sitting in the machine.
If you skip drying and nothing else seems to help, moisture is likely the answer. Dry the filament first, and a lot of frustrating troubleshooting simply melts away.
Adjusting Too Many Settings at Once
The urge to fix everything fast is understandable. It’s also counterproductive.
Stack three changes together, and you lose track of what actually made the difference. Worse, a good tweak can hide behind a bad one, leaving you confused. Slow down and isolate each change.
Tips to Prevent PLA Stringing in the Future
Once your prints come out clean, a little upkeep keeps them that way. These small routines head off stringing before it sneaks back.
They fold easily into your normal printing habits.
Keep the Nozzle Clean
Buildup inside or around the nozzle worsens oozing over time. A quick clean now and then keeps things flowing smoothly.
It’s the kind of maintenance that’s easy to forget until prints start looking rough. A clean nozzle simply behaves more predictably, which means less stringing.
Test New Spools Before Big Prints
New spool? Run a quick test print before committing to a long job.
That small check catches moisture or quality issues early, while they’re easy to deal with. Discovering a stringy spool three hours into a print is a special kind of disappointment worth avoiding.
Revisit Settings as Conditions Change
Your perfect settings aren’t permanent. Humidity shifts with the seasons, and filament ages on the shelf.
So it’s worth re-tuning now and then, especially if stringing creeps back after months of clean prints. A little seasonal adjustment keeps everything running the way you dialed it in.
Frequently Asked Questions
A few questions come up again and again once people start tackling PLA stringing. Here are honest answers.
Why Does PLA String Even at Low Temperatures?
This one puzzles people, and the answer is usually moisture. When you’ve already lowered the temperature and threads still appear, a damp spool is the likely cause.
Trapped water sputters at the nozzle no matter how cool you run it. Drying the filament often helps far more than another temperature drop at that point.
What Retraction Distance Works Best for PLA?
It depends on your printer’s setup. Bowden systems, with that long tube, often need somewhere around 4 to 7mm.
Direct-drive machines need much less, usually about 0.5 to 2mm. Treat these as starting points, not rules. Test from there and adjust based on what your stringing towers actually show you.
Can I Remove PLA Strings After Printing?
Yes, though prevention is easier. Light stringing brushes off with a finger or wipes away with a quick pass from a heat gun.
For stubborn bits, a hobby knife or a light sanding handles them. Still, tuning your settings so the strings never form saves you all that cleanup in the first place.
Conclusion
Learning how to reduce stringing PLA comes down to a handful of simple, repeatable adjustments. What looks like a messy, discouraging problem is usually just a few settings waiting to be dialed in.
The path is clear. Dry your filament first, lower the temperature, tune your retraction distance and speed, then boost travel speed and enable combing to clean up whatever remains.
A few habits keep those results lasting. Change one setting at a time, store your PLA properly, and save a profile for each brand you print with.
So start with dry filament and a small temperature drop, since those two moves deliver the fastest wins. Print a stringing test, make one change, and watch the threads fade. There’s a genuine satisfaction in lifting a flawless, string-free PLA print off the bed, knowing you tuned your machine to get it there.

About
Zevric Halden is a dedicated expert in the world of 3D printing, printer repair, and additive manufacturing, with years of hands-on experience troubleshooting, maintaining, and optimizing desktop 3D printers. His professional focus lies in combining practical mechanical knowledge with modern 3D printing technologies to help users solve printer problems, improve print quality, and keep their machines running reliably. As the author of 3DMend, Zevric explores the technical side of 3D printing, making complex printer issues easier to understand for makers, hobbyists, and professionals alike.
Education
Rochester Institute of Technology
(Rochester, New York, USA)
Associate Degree in Mechanical & Manufacturing Technology
- Focused on mechanical systems, manufacturing processes, machine maintenance, and precision tools.
- Developed practical experience with mechanical troubleshooting, electronic components, and computer-controlled equipment.
- Gained hands-on knowledge of CAD systems, rapid prototyping, and additive manufacturing technologies.
Worcester Polytechnic Institute
(Worcester, Massachusetts, USA)
Bachelor’s in Mechanical Engineering & Additive Manufacturing
- Specialized in digital fabrication, 3D printing systems, mechanical design, and manufacturing technologies.
- Studied printer calibration, motion systems, extrusion mechanisms, material behavior, and print optimization.
- Participated in practical engineering projects involving rapid prototyping, machine diagnostics, and 3D-printed components.
Publications and Impact
Through 3DMend, Zevric shares his expertise on 3D printer troubleshooting, maintenance, calibration, hardware repair, print-quality issues, and additive manufacturing. His writing focuses on turning frustrating printer problems into clear, practical solutions that readers can understand and apply.
From nozzle clogs and extrusion problems to bed-leveling issues, calibration errors, overheating, unusual noises, failed prints, and mechanical wear, Zevric’s guides are designed to help users identify the underlying cause rather than simply treating the symptoms.
His work bridges the gap between technical engineering knowledge and everyday 3D printing, making reliable repair and maintenance information accessible to everyone—from first-time 3D printer owners and hobbyists to experienced makers and professionals.