

You peel a flexible print off the bed, feeling pretty good about it, and then you hit the supports. They cling like they’ve been welded on, stretching and tearing as you pick at them.
Anyone who has printed much flexible filament knows that particular frustration. TPU behaves nothing like rigid plastic, and its supports reflect that.
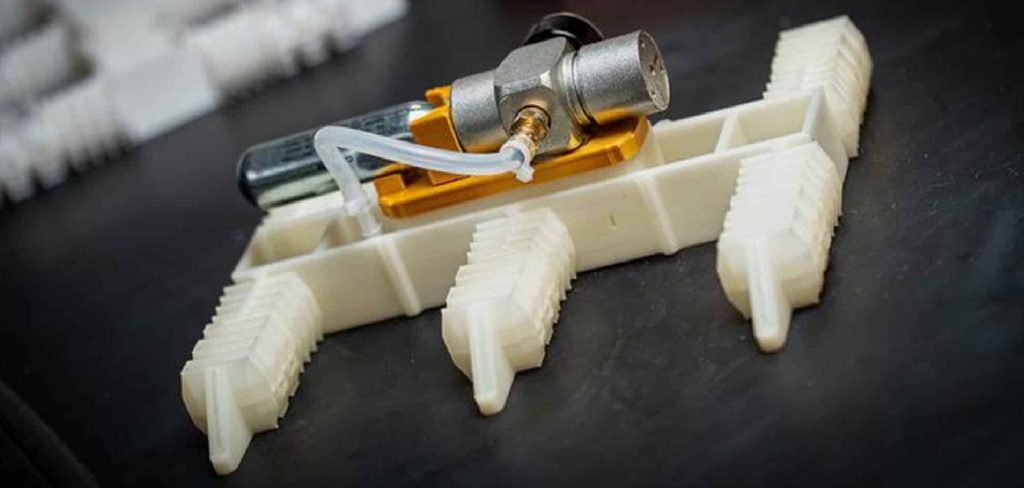
Learning how to support TPU is less about brute force and more about a few thoughtful tweaks. Get them right, and supports peel away cleanly, leaving your overhangs intact.
In this guide, I’ll cover why TPU fights back so hard, when it even needs support in the first place, and the settings that make removal painless. We’ll also walk through a step-by-step process, plus the mistakes worth avoiding.
Why TPU Is So Hard to Support
Before you touch a single setting, it helps to understand what makes TPU such a stubborn material to support. The challenges aren’t random. They stem directly from what makes TPU useful in the first place.
Its flexibility is the whole point, and also the source of most of the trouble.
Flexibility Makes Supports Cling
Here’s the core issue. TPU is rubbery, and rubber doesn’t snap.
When you try to break a support off a rigid PLA print, it fractures cleanly at the contact point. TPU, by contrast, stretches and bends instead of breaking. So the support clings, deforms, and often refuses to let go without a fight.
Stringing and Oozing Complicate Overhangs
TPU also loves to string. Those thin wisps and blobs scatter around the print, and they tend to gather right where the supports meet the model.
The result is a blurry line between print and scaffold. What should be a clean gap becomes a tangled mess, which makes removal harder and messier than it needs to be.
Soft Layers Deform Under Pressure
Then there’s the surface itself. TPU stays soft, so pulling on a stubborn support can bend or gouge the material underneath.
You may end up with dents, tears, or stretch marks exactly where you wanted a smooth finish. The very softness that makes TPU appealing works against you during cleanup.
Understanding When TPU Actually Needs Support
Here’s something worth pausing on. A lot of the time, TPU doesn’t need support at all.
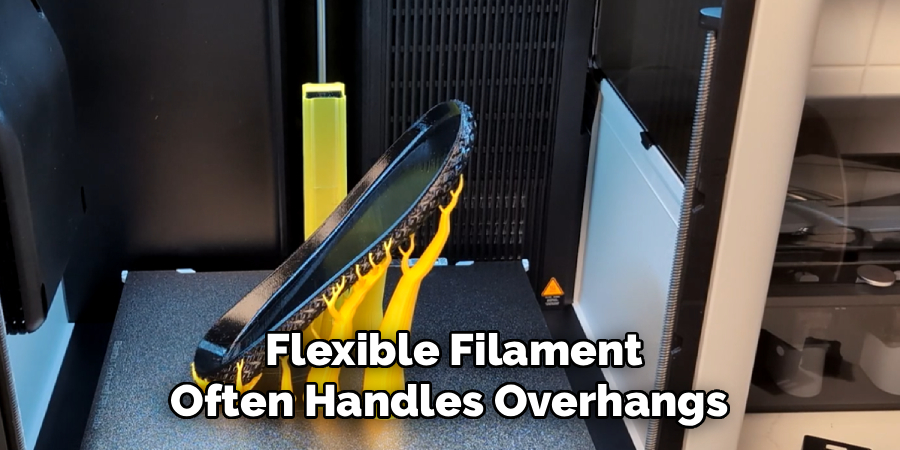
That may sound surprising, but flexible filament often handles overhangs and bridges better than people expect. Figuring out when you can skip supports entirely saves you the whole cleanup headache.
Overhangs and Bridges to Watch
The usual rule of thumb applies, more or less. Overhangs steeper than roughly 45 to 50 degrees tend to sag without help.
Long bridges are the other concern, since unsupported spans can droop in the middle. If your model has either of these, some form of support probably makes sense. Below that threshold, though, TPU usually holds its own.
How Model Orientation Reduces the Need
This is the trick I reach for first, every time. Before adding any supports, spin the model around in your slicer.
Rotating or tilting a part can drop steep overhangs below the danger angle, or lay them flat against the bed. Often a small change in orientation eliminates most of the supports you thought you needed. It’s worth a few minutes of experimenting.
When to Skip Supports Entirely
Give TPU a bit of credit here. It bridges and handles moderate overhangs more gracefully than most rigid filaments.
So before you commit to a forest of supports, ask whether the print actually needs them. Plenty of TPU models come out clean with no support whatsoever, which is easily the best outcome. Less scaffolding means less mess and no risk of marring that soft surface.
Types of Supports for Flexible Filaments
If your model does need support, the type you choose matters more than usual with TPU. Some options peel away far more kindly than others.
Knowing your choices up front saves you from a painful cleanup later.
Normal Versus Tree Supports
Standard grid supports touch the model across a wide area. On TPU, that broad contact turns into a stubborn bond that’s genuinely hard to remove.
Tree supports take a different approach. They branch upward and touch the model at fewer points, which means less to peel and less to mar. For flexible prints, I lean toward tree supports almost by default.
Support Blockers and Custom Placement
You don’t have to let the slicer blanket your whole model. Support blockers let you place supports only where they’re truly needed.
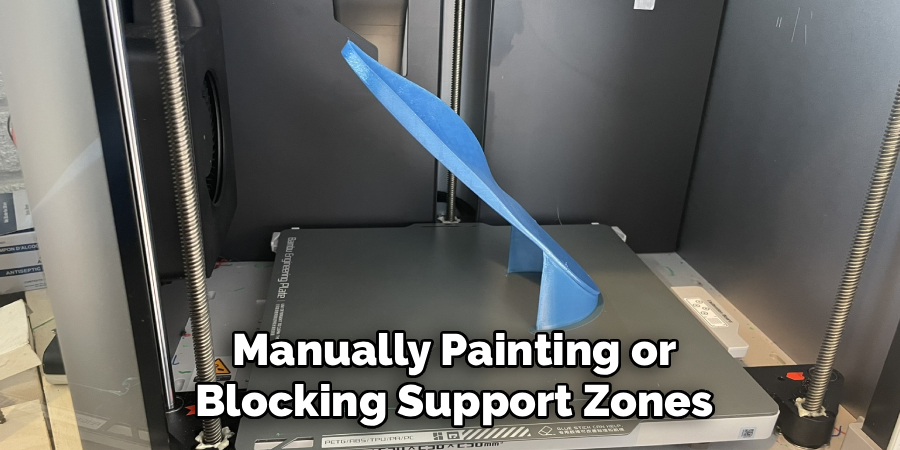
Manually painting or blocking support zones cuts down the total amount dramatically. Less support means less cleanup, which on TPU is always the goal. It takes a little extra setup, but it pays off.
Dissolvable and Dual-Material Supports
For the cleanest possible result, dissolvable supports are hard to beat. On a dual-material machine, you print the supports in a second material that washes away in water.
That leaves your delicate TPU surface untouched, since nothing has to be peeled at all. It requires the right equipment, admittedly, so it’s not for everyone. But when you have it, the finish is worth it.
Best Slicer Settings for Supporting TPU
Most of the battle happens in the slicer, before the print even starts. A handful of settings decide whether your supports release cleanly or fuse into a stubborn mass.
Get these dialed in, and removal becomes almost pleasant.
Increasing Support Z Distance
This is the single most important setting for TPU. The Z distance is the vertical gap between the top of a support and the model above it.
A gap that’s too small lets the two fuse together. Widen it, and the support sits just far enough away to lift off cleanly. We’ll get into specific numbers in the step-by-step section.
Lowering Support Density
Dense supports use more material and create more contact, both of which fight you during cleanup. A sparse, airy pattern is far friendlier.
Lower density supports still hold overhangs steady, but they pull away with much less effort. On TPU especially, less is genuinely more here.
Tuning Retraction and Print Speed
Since stringing muddies the line between print and support, calming it down helps a lot. Slower print speeds and carefully tuned retraction reduce those wispy strands.
Fewer strands mean a cleaner separation when it comes time to remove everything. It’s an indirect fix, but a meaningful one for flexible filament.
How to Support TPU: Step-by-Step Guide
Here’s the heart of it. Work through these seven steps in order, and change one thing at a time so you can see what actually helps. Learning how to support TPU really comes down to patience and good slicer habits, not force.
Take it slow. A little care here saves you from a torn, gouged print later.
Step 1: Orient Your Model to Minimize Supports
Start before you add anything. Rotate and tilt the model so overhangs face the bed or shrink below that 45-to-50-degree threshold.
This step alone can remove the need for most supports. It’s tempting to skip straight to enabling them, but thoughtful orientation is the cheapest, cleanest fix you have. Spend the time here.
Step 2: Choose the Right Support Type
With orientation sorted, pick your support style. For anything but the simplest overhang, tree supports are usually the smart call.
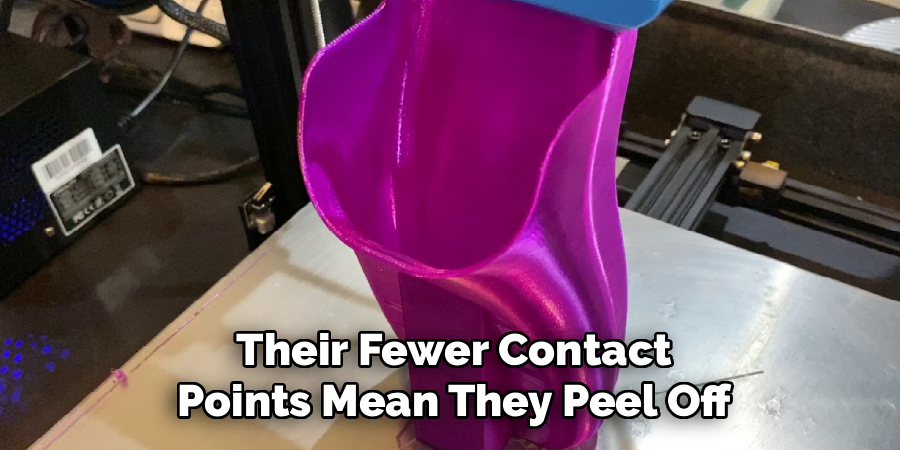
Their fewer contact points mean they peel off soft TPU with far less effort and leave fewer marks behind. This one choice can turn a dreaded cleanup into a quick, satisfying task.
Step 3: Increase the Support Z Distance
Now open your support settings and raise the Z distance. Somewhere around 0.2 to 0.3mm tends to work well for TPU.
That small buffer is what stops supports from fusing to the print. Too little, and you’re back to prying and tearing. This is the setting I’d adjust first if supports keep sticking.
Step 4: Lower Support Density and Contact Area
Next, reduce the support density to a sparse pattern. Shrink the top contact layers too, so the supports touch the model gently rather than gripping across a wide surface.
Light, airy supports still do their job of holding overhangs. But they lift away cleanly afterward, which is exactly what you want with flexible filament.
Step 5: Dial In Retraction and Speed
Now tackle the stringing. Slow your print speed down and fine-tune retraction to cut back on those wispy strands.
Fewer strands around the supports means a much tidier separation between print and scaffold. It’s easy to overlook this step, but it makes the difference between clean and messy cleanup.
Step 6: Enable Support Interface Layers
Turn on a support interface, using a slightly different pattern or spacing at the point where support meets the model. This creates a clean break line.
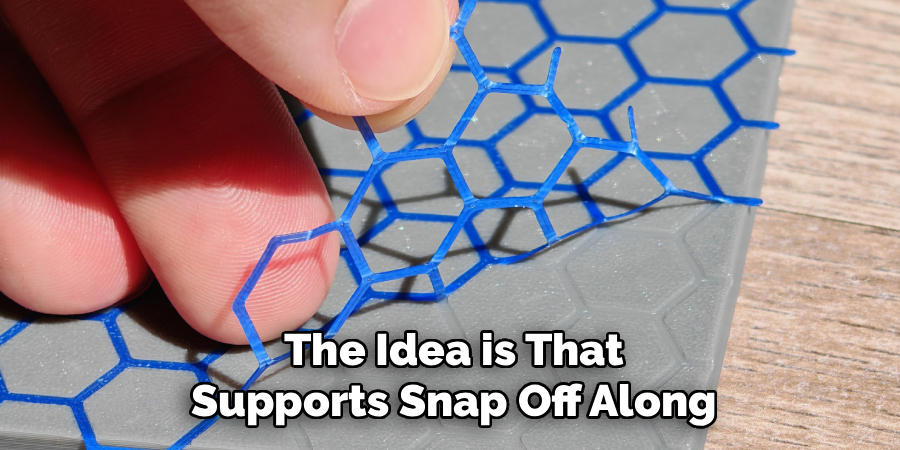
The idea is that supports snap off along that interface instead of tearing at the surface underneath. On TPU, where the surface deforms so easily, this small addition helps preserve the finish.
Step 7: Print a Test and Refine
Finally, run a small overhang or bridge test rather than committing to a big print right away. Watch how the supports behave when you remove them.
If they cling or leave marks, adjust one setting, usually the Z distance, and try again. Once you’ve got a clean release, save that profile for future prints. You’ll thank yourself later.
How to Avoid Support Fusion With TPU
Fusion is the enemy here. When supports bond permanently to your print, removal turns destructive. Preventing that bond is mostly about balance.
A few settings, tuned together, keep supports close enough to work but loose enough to release.
Getting the Z Distance Just Right
This is a bit of a balancing act. Too small a gap fuses everything, while too large a gap leaves overhangs drooping without proper support.
The sweet spot sits in the middle, often around that 0.2 to 0.3mm range. Test a few values and see what your specific TPU and printer prefer. It varies more than you’d expect between setups.
Reducing Top Interface Contact
The less the support grips the model, the weaker the bond. So fewer interface layers and wider spacing create a break line that gives way easily.
You’re deliberately making the connection a little flimsy at the top. That flimsiness is a feature, not a flaw, since it’s precisely what lets the support snap free.
Managing Print Temperature
Heat plays a quiet role too. A nozzle running hotter than necessary makes TPU meld more aggressively with its own supports.
Nudging the temperature down a touch can reduce how firmly the two bond. Just keep it within the range where layers still adhere well, since going too cool creates its own problems.
Recommended Support Materials for TPU
Not every support has to be TPU. Depending on your printer, other materials can make cleanup dramatically easier.
Here’s how the main options tend to shake out.
Using TPU as Its Own Support
The simplest route is supporting TPU with more TPU. When your settings are dialed in, this works fine and keeps things affordable.
Everything prints in one material, so there’s no extra spool or setup to worry about. The catch is that removal still requires care, since you’re peeling flexible from flexible.
Pairing With a Rigid Support Filament
On a dual-extruder machine, a firmer material like PLA makes an excellent support for flexible prints. Rigid supports snap off cleanly, the way you wish TPU supports would.
The contrast between the two materials creates a natural, easy break. It’s one of the better arguments for a second extruder if you print a lot of TPU.
Water-Soluble Options for Clean Results
For flawless results, water-soluble supports are the gold standard. They dissolve away entirely, leaving delicate TPU surfaces untouched.
No peeling, no marks, no torn overhangs. The trade-off is cost and the need for compatible equipment, but the finish is about as clean as it gets.
Tips for Removing Supports From TPU Prints
Even with perfect settings, the removal itself deserves a gentle touch. Rushing it can undo all your careful slicer work.
A little patience goes a long way with flexible filament.
Peel Slowly and Patiently
Yank a support off TPU, and you’ll likely stretch or tear the surface. So go slow.
Gentle, steady pressure lets the support release without deforming the soft material beneath. It’s tempting to rush, but the print will show the difference.
Use the Right Tools
Your fingers alone won’t reach every spot. Flush cutters, tweezers, and a hobby knife help lift supports from tight corners and awkward angles.
Good tools give you control, which matters when the surface underneath is so easily marked. Work carefully, cutting toward the waste rather than the print.
Clean Up the Surface Afterward
Once the supports are gone, you may find small nubs left behind. A light sanding smooths them out.
A quick pass with a heat gun can also melt away tiny remnants for a cleaner finish. Just keep the heat moving so you don’t warp anything.
Common Mistakes to Avoid
Everyone stumbles a little when they start supporting TPU. These are the missteps I see most, and each is easy to sidestep once you know it’s coming.
No judgment here. I’ve made all of them.
Setting the Z Distance Too Low
This is the big one. A tiny Z gap fuses supports so tightly that removal damages the print underneath.
If your supports won’t come off cleanly, this is the first setting to check. Widening it usually solves the problem in one move.
Using Dense Supports Everywhere
Blanketing a model in heavy supports wastes filament and turns cleanup into a battle. More support isn’t safer; it’s just harder to remove.
Use sparse density and place supports only where they’re genuinely needed. Your future self, peeling everything off, will appreciate the restraint.
Ignoring Model Orientation
Skipping the orientation step forces unnecessary supports onto every overhang. It’s the most common oversight, and the most avoidable.
Always try reorienting the model first. Often you’ll eliminate half your supports before adding a single one, which is the easiest win available.
Frequently Asked Questions
A few questions come up again and again once people start working with flexible filament. Here are honest answers.
Can You Print TPU Without Any Supports?
Very often, yes. TPU bridges and handles moderate overhangs surprisingly well, so plenty of models print support-free with smart orientation.
Always try reorienting first. You may find the print doesn’t need supports at all, which spares you the whole removal process.
What Support Z Distance Works Best for TPU?
A gap around 0.2 to 0.3mm tends to hit the balance. It’s wide enough to prevent fusing but still close enough to hold overhangs.
That said, the ideal value shifts a little between printers and TPU brands. Test a couple of settings on a small model to find yours.
Are Tree Supports Better for Flexible Prints?
Generally, yes. Tree supports touch the model at fewer points, which makes them the easiest type to remove from soft TPU.
Less contact means less clinging and fewer marks. For most flexible prints, they’re my default choice over standard grid supports.
Conclusion
Learning how to support TPU turns fused, frustrating scaffolds into supports that peel away cleanly and leave your flexible prints looking their best. What feels like an impossible material to work with is really just one that asks for a different approach.
Success comes from a clear sequence. Orient the model to reduce supports, choose tree supports, widen the Z distance, lower the density, and tame the stringing with tuned retraction and speed.
A few habits carry you the rest of the way. Change one setting at a time, tune your interface layers, and remove supports slowly and patiently rather than yanking them.
So start with smart orientation, since that alone removes many supports before printing even begins. Run a quick overhang test, adjust as needed, and save what works. There’s a genuine satisfaction in peeling a support away cleanly and revealing a flawless flexible print underneath.

About
Zevric Halden is a dedicated expert in the world of 3D printing, printer repair, and additive manufacturing, with years of hands-on experience troubleshooting, maintaining, and optimizing desktop 3D printers. His professional focus lies in combining practical mechanical knowledge with modern 3D printing technologies to help users solve printer problems, improve print quality, and keep their machines running reliably. As the author of 3DMend, Zevric explores the technical side of 3D printing, making complex printer issues easier to understand for makers, hobbyists, and professionals alike.
Education
Rochester Institute of Technology
(Rochester, New York, USA)
Associate Degree in Mechanical & Manufacturing Technology
- Focused on mechanical systems, manufacturing processes, machine maintenance, and precision tools.
- Developed practical experience with mechanical troubleshooting, electronic components, and computer-controlled equipment.
- Gained hands-on knowledge of CAD systems, rapid prototyping, and additive manufacturing technologies.
Worcester Polytechnic Institute
(Worcester, Massachusetts, USA)
Bachelor’s in Mechanical Engineering & Additive Manufacturing
- Specialized in digital fabrication, 3D printing systems, mechanical design, and manufacturing technologies.
- Studied printer calibration, motion systems, extrusion mechanisms, material behavior, and print optimization.
- Participated in practical engineering projects involving rapid prototyping, machine diagnostics, and 3D-printed components.
Publications and Impact
Through 3DMend, Zevric shares his expertise on 3D printer troubleshooting, maintenance, calibration, hardware repair, print-quality issues, and additive manufacturing. His writing focuses on turning frustrating printer problems into clear, practical solutions that readers can understand and apply.
From nozzle clogs and extrusion problems to bed-leveling issues, calibration errors, overheating, unusual noises, failed prints, and mechanical wear, Zevric’s guides are designed to help users identify the underlying cause rather than simply treating the symptoms.
His work bridges the gap between technical engineering knowledge and everyday 3D printing, making reliable repair and maintenance information accessible to everyone—from first-time 3D printer owners and hobbyists to experienced makers and professionals.